home mise tips events recipes photography

Wednesday, December 18, 2013

Salt

We all know how much I love salt as a seasoning, but there are so many more uses!

Beyond Seasoning: Other good uses for salt
Though most of the time we use salt for seasoning, it also comes in handy for a wide range of less obvious applications.

Dulling the Bitter Edge

Here’s a little-known fact about salt: It masks bitterness. Our tastebuds have many more receptors for bitterness than for the other four basic tastes (sweet, sour, salty, and umami); thus, bitterness can often overwhelm other flavors present in food. Salt works to block the taste of bitter compounds, thereby enhancing other less prominent flavors. We add salt to everything from eggplant to coffee, where we’ve found that adding 1/8 teaspoon to the grounds for every full (72-ounce) pot reduced the perceived bitterness.

Tender Scrambled Eggs

Salt keeps egg proteins from bonding to one another, thereby producing a weaker protein chain and more-tender scrambled eggs. We recommend adding 1/8 teaspoon of table salt for every two eggs just prior to cooking.

Deep-Cleaning Cast Iron

The abrasive quality of kosher salt makes it a perfect cleanser for rusty or gummy cast-iron cookware. Our method: Warm 1/4 inch vegetable oil in pan for 5 minutes; remove from heat and add 1/4 cup kosher salt. Scrub salt into pan with paper towels until debris loosens. Rinse well and repeat if necessary.

Making Garlic Paste

Garlic paste adds robust garlic flavor to dishes like aïoli and pesto. To ensure that the garlic’s texture is smooth and unobtrusive, sprinkle kosher salt over minced garlic and use the side of a knife to reduce the chopped garlic to a fine paste.

Greener Green Beans

Adding salt to the cooking water not only seasons green beans but also helps them retain their bright color. When green vegetables cook in unsalted water, some of the chlorophyll molecules lose their color-enhancing magnesium atoms; this causes the vegetables to turn a dull shade of olive green. Salt stabilizes the chlorophyll, helping the vegetables stay greener. To maximize color retention without oversalting, use 1½ teaspoons of salt for every quart of water.

Quick-Chilling Drinks

Salted ice water will chill beverages faster than regular ice water or even the freezer. When salt is added to ice water, the freezing point and temperature decrease, lowering the ice’s melting temperature to well below 32 degrees. The result is a brine significantly colder than plain ice water that can rapidly chill liquids. When we tested this trick with three 750-milliliter bottles of wine, the bottle chilled in an ice-water brine plunged to the optimal 38-degree temperature roughly twice as fast as the freezer-stashed bottle and three times as fast as the one submerged in regular ice water.
Ice-water brine formula: For every bottle of wine or three to four (12-ounce) bottles of beer or soda, mix 1 quart of water with 4 quarts of ice and 1 cup of table salt.
Published with permission from Cook's Illustrated.


Friday, December 6, 2013

Julienne Raw Brussels Sprout Salad


Julienne Raw Brussels Sprout Salad


I’m not sure where I got this idea, but it wasn’t original.  It might’ve been a professional chef magazine, or one of my “I’m in love with food” magazines, but I did make it my own.


I love Brussels Sprouts, roasted and crunchy, not the “I’ve cooked these in water until they are mush” kind.  I’m a vegetable snob, ask my husband and he’ll let you know, I’ll return a dish to the kitchen, if my veggies are icky! 

I tried to use a small slicer to julienne the sprouts, but gave up and used a knife instead. 


Dressing

1 tbs good grained mustard
3 tablespoons honey
¼ cup red wine vinegar
½ cup to ¾ cup EVOO
Salt and pepper to taste


Whisk all the ingredients together.  Yes this is too much for one salad, but it’ll keep for a few days in the refrigerator!


Now for the salad!

1 serving as a vegetarian entrée!
2 cups Brussels sprouts (clean) – julienne or chopped fine – raw
1 cup spinach – julienne
1/4 cup black beans
¼ cup almonds
½ small avocado – diced or smashed however you like it
2 tbs pomegranate arils (that’s seeds!)
1 tablespoon pumpkin seeds
Feta Cheese crumbles to taste (this is an afterthought – I think it would be wonderful on my salad!)
 

Toss together, and enough dressing to coat, but not drench and enjoy


Wednesday, November 27, 2013

Cranberry Sorbet


Cranberry Sorbet


Everyone is making cranberries this season, and my mouth is watering.  I buy at least 8 bags to use throughout the year, surprisingly fresh cranberries are hard to find immediately after Thanksgiving and I like to have them throughout the year!  The fresh ones freeze in the bag just as they are and will keep for at least one year- that is, if you don’t eat them up!

Here’s a refreshing way to serve cranberries.  You do need an ice cream machine, if not spread the sorbet mixture in a 9 x 11 pan, and place in the freezer, stirring occasionally until frozen.  Then you can make a GRANITA out of it!  What’s that – well use your fork, and scrape up the mixture – like a frozen ice, and scoop it out – it’s still wonderful!


Cranberry Sorbet

4 ½ cups fresh cranberries, washed, drained, stems removed and discard
2 ¼ cups granulated sugar
2 ¼ cups white cranberry juice
1 ½ cups water
¼ teaspoon salt
3 tablespoons light corn syrup
2teaspoons chopped fresh lime or orange zest


Place cranberries, sugar, white cranberry juice water and salt in a 3 ¾ quart saucepan.  Bring to a boil over high heat.  Reduce heat to medium low and simmer for 15 minutes, until the berries pop.  Cool 10 – 15 minutes.  Drain cranberries (reserve liquid) and place in a work bowl of a food processor fitted with an “S” blade or a blender.  You may need to do this in two patches.  Add 1 cup cooking liquid and puree until smooth.  Press through a fine mesh strainer to remove seeds and pulp; discard seeds and pulp.  Stir in remaining liquid, corn syrup and zest.  Cover and refrigerate until chilled, about 6 hours.


Follow the manufacturer’s directions for your machine


Sunday, November 24, 2013

How to Bake & Decorate a Cookie


Even Big Kids love to decorate cookies!


Now that it's Christmas time everyone wants to decorate cookies!

The number one rule - patience
The number two rule - more patience, especially if you are expecting young children to decorate expertly!


Cookie – defined: “small cake”

Yes that’s basically a cookie, and like cakes a multitude of problems can sometimes arises from poor ingredients, over mixing, or oven temperature is incorrect.


Basic Cookie Traits
 
Crispness
Softness
Chewiness 

Spread


When making cookies to decorate or roll out, spread is one of the most important factors!  You want your cookie to maintain it’s shape and a dough that is proportionate to butter and flour will make the best match.


Butter Cookies (like sugar cookies) require special attention.  If you make a large batch and your kitchen is warm, keep the extra dough in the refrigerator while it waits to be rolled. 
 

Chill dough for rolled cookies at least 5 hours in the refrigerator


When you bake delicate butter cookies, use bright shiny baking sheets, they don’t get as hot

Line your cookie pans with parchment paper, it helps with clean up, and your cookies won’t stick as much.  If you need to, you can lightly spray the paper
 
When your cookies cool, do not let them “steam” the cooling rack should be a good 5 – 6 inches above the counter

Margarine and butter have different shortening powers and cannot be “interchanged” in a recipe and get the same results

Use the best ingredients that you can!  Pure vanilla is so much better than imitation.
Check your baking powder if using – spoon ½ teaspoon in a bowl and pour ¼ cup of boiling water over it.  It should bubble up right away, if not discard it and purchase more.
Baking Soda does not have a “shelf” life, but some manufacturer’s suggest replacing after 3 years.  Check the box for the expiration date!
Measure the same way all the time!  If you spoon your flour lightly into a cup, do that every time; if you weigh it on a scale, do that every time.
Though these are chocolate chip cookies, you can see the difference in the basic recipe.  Just as with sugar cookies, the more butter, the stiffer the batter

-most sugar cookies use a little bit of baking soda or none at all! 


1.  Out line your cookies - take your time (notice the "candy cane") and let it dry completely.


2.  If you are using royal icing - after filling in the cookie, wait until it sets to add some accents, otherwise, it just runs together and you have a Picasso!
 
 
3.  If it gets sloppy - eat em!


4.  If you wait to long and the royal icing sets, the sprinkles will roll off!


5.  It takes a steady hand, and lots of time to outline a cookie with pearls!  Unless you have a lot of time, use them for accents on trees and stars, otherwise, it'll look like my crooked stocking!
 
Basic Sugar Cookies
Makes approximately 18 cookies 

Ingredients

2 ½ cups all purpose flour, spooned and leveled, plus more for dusting the cutting board for shaping/rolling out

¼ teaspoon baking soda

¼ teaspoon kosher salt

1 cup unsalted butter (2 sticks) at room temperature, but not soft

¾ cup sugar

1 large egg

1 teaspoon pure vanilla extract (clear vanilla extract if available)


Whisk together the flour, baking soda, and salt – set aside

Using an electric mixer beat the butter and sugar until smooth.  Add the egg and beat until fluffy, about 2 minutes.  Beat in vanilla.

With the mixer on low, gradually add the flour mixture, mixing until just incorporated – the dough will be stiff.  Shape into a disk and refrigerate, for at least one hour, and up to 3 days.  If you want you can shape it into a “log” for slicing cookies.

Preheat oven to 350° F

Roll out cookies on a cutting board that has been dusted lightly with flour.  You may choose to do this between two sheets of parchment paper.  Roll out to 1/8”.  Cut out shapes and place on cookie sheet.

Bake for 12 – 15 minutes until the edges are firm, and the cookie is lightly browned.  Remove from oven.  After 1 minute, remove from cookie sheet and place on a cooling grid/rack.

Cool completely before frosting.


Store in an airtight container for up to 7 days or freeze for up to 3 months


There are many different icing recipes.  I use royal icing for almost everything, why, I usually have confectioner’s sugar and water available.  You can use flavorings and color your icing as you choose.

 
Simple Royal Icing


3 – 6 tablespoons water
1 pound sifted confectioner’s sugar
food coloring as needed


Mix the water into the sugar, slowly. 

To outline cookies use a b it more water – check for consistency less water will be thicker and allow you to have a “straight” line


To fill in cookies you may need to add water to the batter.


Thursday, November 7, 2013

A little bit of salt


I love salt. Salt gets a bad rap out in the “foodie” world, especially from people who eat lots of processed foods.

I also teach at a culinary classroom, and am amazed by the “shock” when I salt my water for pasta and potatoes.  A gasp usually comes from the group, and I ask – “who did that?”  Usually someone will fess up, and I’ll explain the science behind salting water.  Most package directions ask for about 2 tablespoons of salt for 8 quarts of water.  Now, granted, that seems like a lot, but it’s not like I poured 2 tablespoons on top of cooked pasta!  That would be salty!

The human adult body needs approximately 250 grams  of salt to survive.   We get that in food, and our excess comes from processed foods.  Most babies when they are born don’t care about salt.  It’s not until we start ingesting foods with lots of salt, that we become addicted to it.


I’m fortunate that my blood pressure is usually in line, and I don’t add much table salt to my food.  I do love salty snacks on occasion.  But back to why salt the water?


Salting water brightens the dish’s final flavor, while keeping the sodium level in check.  When pasta or potatoes hit the boiling water, its starch molecules absorb only about 10% of the salt.  One of the key words is “it absorbs”, meaning it gets into the food, not just shaken on the top!  That’s enough to take care of your salt sensors on your tongue!  A 4 oz portion of pasta will have 92 mg of sodium.  Sprinkle 1/8 of a teaspoon on that pasta and you’ll consume 290 mg!


Remember; if you spill some salt throw it over your shoulder for good luck.  Here’s one of the explanations – there are lots out there!

The belief of tossing a pinch of salt over your left shoulder to get rid of bad luck come from the legend that the devil is always standing behind you, and throwing salt in his eye distracts him from causing trouble. Nowadays, most people only do this after spilling salt, which is thought to be bad luck because salt, was an expensive commodity long ago and folklore linked it to unlucky omens in order to prevent wasteful behavior.


Friday, October 11, 2013

Butternut Squash & Apple Soup


Butternut Squash & Apple Soup


I was at the Metro Health Farm Market yesterday with Visser Farms. The last day of the market for 2013!  I’ve mentioned many times how much I love the market days!  I made butternut squash & apple soup, and I so love this recipe.  It’s really a guideline; you can make it your own by adding in more apples, using apple cider instead of broth or water, or by thinning it with a bit of heavy cream, yogurt or sour cream.  Mix up your spices by using paprika, a bit of caynne, or whatever suits your fancy.


Start out with a basic mirepoix of onions, celery and carrots


Caramelize them with a bit of evoo in the bottom of your pan

Add the apples and butternut squash, a bit of stock, water, or apple cider


Simmer, this is the best part, your home will be smelling of Autumn and spices.

When the veggies are “fork tender”  move them to a food processor, blender, food mill or immersion blender and whirl away until smooth.


Return to the pan, and let simmer adding in stock, water, or cider to taste.  Make sure you season with S&P and I used Sultan’s Gold by Johnny Secreto!

Dish up and enjoy!

I hope you enjoy it also!


- Tuxedo Junction Cateringa personal chef experience

Chef Terri Rees
 
Butternut Squash Apple Soup


Yield: Serves 4-6.


Ingredients

•1 medium yellow onion, chopped

•1 rib of celery, chopped

•1 carrot, chopped

•2 Tbsp butter

•1 butternut squash, peeled, seeds removed, chopped

•1 tart green apple, peeled, cored, chopped (squash and apple should be at a 3 to 1 ratio)

•3 cups chicken broth (or vegetable broth if vegetarian)

•1 cup water

•Johnny Secreto Sultan’s Gold Seasoning to taste

Roasted Chopped Chestnuts for garnish


1 Set a large saucepan over medium-high heat and heat the butter for 1-2 minutes. Do not let it turn brown. Add the onion, celery and carrot and sauté for 5 minutes, taking care to turn the heat down if the vegetables begin to brown.


2 Add squash, apple, broth and water. Bring to boil. Cover, turn the heat down to a simmer and cook for 30 minutes or until squash and carrots soften. Puree, and return to a clean pot.

3 Add salt and spices to taste, and garnish with chives or parsley.


Tuesday, October 8, 2013

Celsius to Fahrenheit!


Celsius to Fahrenheit Conversions


Ever get into a cook book with Celsius?  I know there are lots of “apps” out there that will help with the conversion, but ever wonder what the formula is?


Celsius X 1.8 + 32 = Fahrenheit


I realize that you may not want to do that, so I’ve done a few conversions for you.


Fahrenheit
Celsius
250
120
275
140
300
150
324
160
350
180
375
190
400
200
425
220
450
230


Sunday, September 29, 2013

French Press Coffee


French Press Coffee


I do love a good cup of coffee.  I’m the first to admit though, that first thing in the morning, I just want to chug down some quick caffeine and get my day going.  At those times, I’m not doing designer coffee; I’m not adding extra calories with cream and sugar, it’s just pure unadulterated caffeine.  I’m actually trying to cut down a bit.
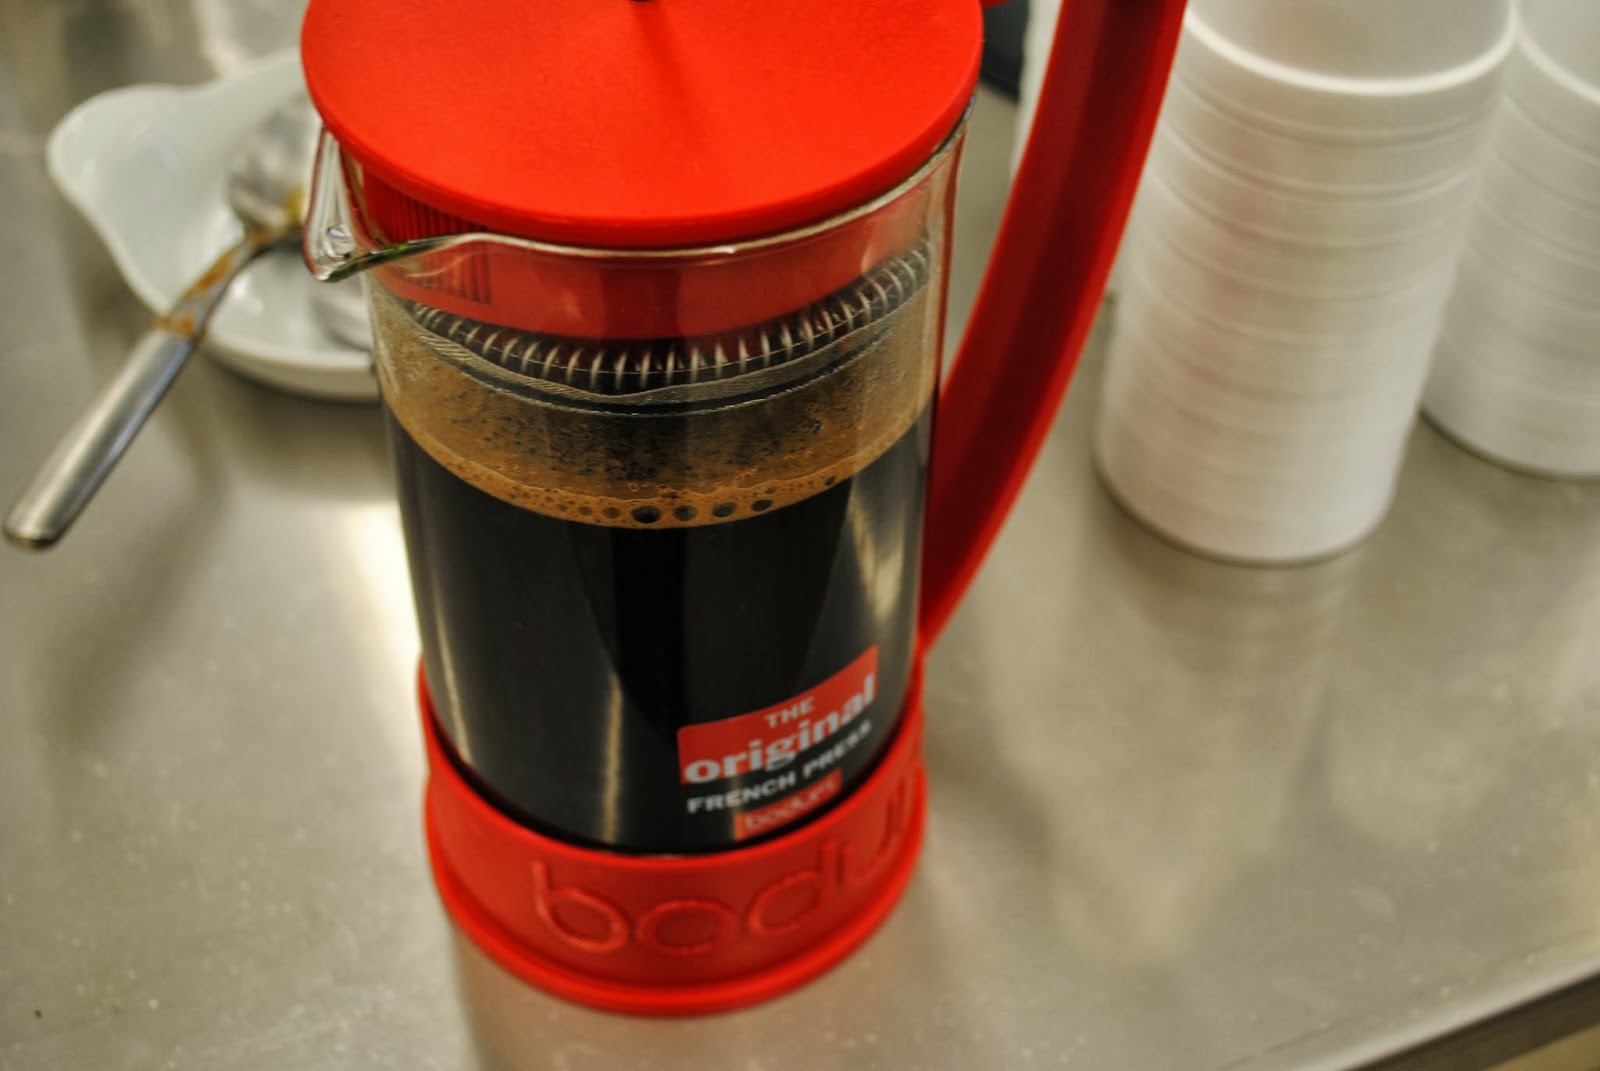
I own a French Press, and it’s bright Red!  I love colorful items, and it makes my heart happy.  I recently was able to demonstrate how easy and thoughtful making coffee in a French Press can be.  It’s not difficult.  It takes a bit of time, and there is a feeling of ritual.  Slows down the mind, body, and soul, and let’s you relax and be in the moment.  I need to do more of this.
Today, most coffee’s will tell you what the proper brew temperature and time is on the package, and they do lots of testing and research, so I try to follow the package.


Simply scoop the rough ground coffee of your choice into the bottom of your French Press. 
Add the water;
Stir with a wooden spoon


Cover


Let set for about 5 minutes


P

Press the plunger down slowly


Pour a great cup of coffee


Relax.


That’s it.


I have to start doing this more often


Enjoy your coffee today!  Enjoy your day!

Tuesday, September 24, 2013

I am passionate about food


I am passionate about food, and I am especially passionate about your food.
 ~ Chef Terri Rees, Tuxedo Junction Catering


Chef Terri Rees puts the personal in personal chef. She interacts with clients to provide individualized service, whether sharing tips on equipment or ingredients, preparing an elegant dinner party, or planning hands-on fun in commercial or home kitchens. She assesses client needs – including food sensitivities and intolerances – to make every event a unique and enjoyable experience.


Her skills

Chef Terri is a graduate of Grand Rapids Community College’s prestigious Hospitality Department, and no stranger to large-scale menu planning and food preparation: as a Creative Dining Services sous chef at Davenport College, she provided 400 meals a day.

She is a classroom instructor and provides equipment and ingredient demonstrations at several locations, including Rylee’s Ace Hardware, Spartan Stores, Frederik Meijer Gardens. Those who attend her events find Chef Terri fun to be with; her joy in cooking and sharing food brings people together for a good time.

With 27 year’s experience in project management and corporate sales, Chef Terri brings excellent planning and logistical skills to event organization.

She easily accommodates food sensitivity issues in menu planning: she has extensive experience in creating gluten-free and allergen-free dishes for family and friends.


 Her Services


~ Hands-On Cooking Classes easy, challenging or any level between; customized for your group, whether in a home or a commercial kitchen.

~ Demonstration Dinner Party – Chef Terri prepares an entire meal for your guests, who can watch and learn, ask questions and sample throughout the process. (Recipes, ingredients & equipment supplied by chef; wine provided by client.

~ Team Cooking Event – Chef Terri provides Mystery Ingredient Baskets & group divides into teams, each creating original recipes within a time limit. Hilarious food fun and a great way to build team spirit for corporate groups of 10 to 20 employees.


~ And the sky’s the limit – got a new idea for food-centered fun? Talk to Chef Terri and let her plan a unique event just for you!


Tuxedo Junction Catering  ~  616.304.0297

Saturday, September 14, 2013

Autumn Stew


Autumn Stew

Just a quick recipe, sorry no pictures, I’ll try and get some for you. 

I had my opening night at the Culinary Classroom on Thursday Night – and I love to give my guest something to eat, in line with the curriculum for the class. 

This class was all about Sunday Dinner w/ Grandmas.

Fried chicken, pot roast, home made biscuits and crème Brulee – I know your grandma probably didn’t make crème Brulee, but I know she made pudding from scratch, not from a box!  At least mine did!


I made a warm and inviting Autumn Stew with pork tenderloin pieces, apples, Craisins, cider and more.  This time I served it over jasmine rice, but you could serve this over noodles, or just as it was, with a side of mashed potatoes or squash, which are at the markets right now!.  It’s a one pot meal (except for the rice) and is easy, can be done in about 30 minutes if you cut your pork, apples, and everything up fairly small.  Give it a try, I promise pictures sometime soon!

Autumn Stew


 4
Celery Stalks diced
3
Whole Carrots diced
1
Spanish Onion diced
2 TBS
TBS EVOO
 
Flour as needed for dredging
1
Pork Tenderloin
4
Mac or Granny Smith Apples-diced
4
Sprigs Thyme
1
Bay Leaf
 
Salt & Pepper to taste
1 ½ cups
Apple Cider
4 Cups
Chick Stock
1 Handfull
Craisins (about cup – cup ½)


Cut pork tenderloin into bite sized pieces, about 1 inch x 1 inch

Dredge pieces in seasoned flour

Heat approximately 1 TBS of EVOO in a heavy duty Dutch oven, and brown pork.  Remove from pan.  Heat remaining oil and add onion, celery and thyme and cook until tender.  Add Apples and Cider, and stir, making sure that you do not burn the bottom of the pan.  Add Craisins and pork and cook until the pork is fork tender (simmering approximately 20 minutes)