home mise tips events recipes photography
Showing posts with label Tips and Tidbits. Show all posts

Tuesday, February 11, 2014

A Lesson In Patience - Valentines Day Cake Pops


I was at Rylees Ace Hardware on Michigan Avenue recently to demonstrate how to make Cake Pops.  You say a hardware store?  Well owner Lori  has an entire kitchen area in her flagship store.  It’s rather lovely, and unique.  I always tell our guests you never know what you’ll find going on at Rylees Ace Hardware!


This time it was Cake Pops. Now this is not a particularly difficult process, but it is time consuming.  You have to have patience.  The chocolate or coating has to be just the right consistency, you have to wait for it to dry (unless you want sprinkles, then it has to be “tacky” enough) and you must be organized.

There are lots of ways to go about this and there are hundreds of “how to’s” on out there. 

Let’s cut to the chase.

1.  Bake a cake and cool it completely (I used a normal box cake and got over 3 dozen cake drops/pops). A friend suggested finding a full baked discounted cake and mixing it together, to save a few steps.  Brilliant idea!


2.  Mix in 1 can of prepared frosting


3.  Chill completely

4.  Using a small (I used a #70 truffle scoop) scoop – get them all out, roll them up and place them in the refrigerator to chill – once again


5. If making “pops” – get a piece of Styrofoam and cover it with aluminum or clear wrap – so you can  use it over and over again.


6.  Melt your coating, following package directions – I used almond candy bark and chocolate couverture, I like the couverture because it gives a high glossy finish.  If you need to “thin” out – use a bit of Crisco.  It will help melt evenly through your coating.

7.  For “pops” swirl a bit of coating around the tip of the stick and place it into your “pop” and once again place in the fridge for firming up.

8.  Now you are ready to coat!  I always use a small amount of coating, this way if it gets gooey, gummy or stuff in it, you’re not wasting a lot of dollars on chocolate!


9.  Once you dip the cake drops/pops make sure that you let the excess coating drip off.

10.  Place in the Styrofoam or on parchment paper, and then wait once again for it to dry.  If you’re using sprinkles, now’s the time, before it gets hard!

11.  Finally – you can enjoy.


I placed some cake pops in individual wrappers, in a ball jar, as a gift.  They are easy to make, and fun.


Wednesday, January 22, 2014

I Plan Parties


I plan parties and execute them for a living.  I’m passionate about food, plates, silverware, the setting – all of it.  It’s a good thing I do this for other people, because my husband couldn’t care less most of the time!  He doesn’t understand why I like the plates all in the same spot on the table setting, or the glasses in the correct corner.  What does that say?!  Every day meals at the Rees Residence are probably just like the ones at your house.


When I plan “big” parties for my clients I take the stress of this planning away from them.  Usually not all of it, my domain is the kitchen, the dining room, where ever there is food.  It’s usually at least 50% of the stress that they have.  Everyone loves the adrenaline rush that you get while preparing for a party, even my husband – he won’t admit to it, but I know that it’s true! They worry if the house is clean enough, do I have enough ice, what’s the weather going to be like, and everything in-between! 

I’ve seen long complicated check list.  I have a few that I make up for my events, and I wouldn’t even begin to suggest that you do this!  You know how much silverware you have, and where your glasses are! 

There are some things that you can do, and here are some easy tips to keep in mind.


5 Easy Tips

1.  I always try out the recipe before I actually try it on my guests! Why?  I need to know how it will taste – and so should you! I need to know how it will cook, and so should you!  And most important, I need to know how much time it will take me to get it done!

2.  Don’t go too complicated.  Not all of us are master chefs and sometimes simple with a few little tweaks are  great.

3.  Shop, Shop, Shop – make sure you have all of the recipe’s ingredients on hand – we call this mise en place. 

4. Taste your ingredients (or smell them) for freshness, and taste your meal as you go!  That’s the only way you’ll know how the finished product will turn out!

5.  Finish with a great (and easy) dessert!  It’s the last bite of the day, and that’s the one that they will all remember.


Wednesday, December 18, 2013

Salt

We all know how much I love salt as a seasoning, but there are so many more uses!

Beyond Seasoning: Other good uses for salt
Though most of the time we use salt for seasoning, it also comes in handy for a wide range of less obvious applications.

Dulling the Bitter Edge

Here’s a little-known fact about salt: It masks bitterness. Our tastebuds have many more receptors for bitterness than for the other four basic tastes (sweet, sour, salty, and umami); thus, bitterness can often overwhelm other flavors present in food. Salt works to block the taste of bitter compounds, thereby enhancing other less prominent flavors. We add salt to everything from eggplant to coffee, where we’ve found that adding 1/8 teaspoon to the grounds for every full (72-ounce) pot reduced the perceived bitterness.

Tender Scrambled Eggs

Salt keeps egg proteins from bonding to one another, thereby producing a weaker protein chain and more-tender scrambled eggs. We recommend adding 1/8 teaspoon of table salt for every two eggs just prior to cooking.

Deep-Cleaning Cast Iron

The abrasive quality of kosher salt makes it a perfect cleanser for rusty or gummy cast-iron cookware. Our method: Warm 1/4 inch vegetable oil in pan for 5 minutes; remove from heat and add 1/4 cup kosher salt. Scrub salt into pan with paper towels until debris loosens. Rinse well and repeat if necessary.

Making Garlic Paste

Garlic paste adds robust garlic flavor to dishes like aïoli and pesto. To ensure that the garlic’s texture is smooth and unobtrusive, sprinkle kosher salt over minced garlic and use the side of a knife to reduce the chopped garlic to a fine paste.

Greener Green Beans

Adding salt to the cooking water not only seasons green beans but also helps them retain their bright color. When green vegetables cook in unsalted water, some of the chlorophyll molecules lose their color-enhancing magnesium atoms; this causes the vegetables to turn a dull shade of olive green. Salt stabilizes the chlorophyll, helping the vegetables stay greener. To maximize color retention without oversalting, use 1½ teaspoons of salt for every quart of water.

Quick-Chilling Drinks

Salted ice water will chill beverages faster than regular ice water or even the freezer. When salt is added to ice water, the freezing point and temperature decrease, lowering the ice’s melting temperature to well below 32 degrees. The result is a brine significantly colder than plain ice water that can rapidly chill liquids. When we tested this trick with three 750-milliliter bottles of wine, the bottle chilled in an ice-water brine plunged to the optimal 38-degree temperature roughly twice as fast as the freezer-stashed bottle and three times as fast as the one submerged in regular ice water.
Ice-water brine formula: For every bottle of wine or three to four (12-ounce) bottles of beer or soda, mix 1 quart of water with 4 quarts of ice and 1 cup of table salt.
Published with permission from Cook's Illustrated.


Tuesday, October 8, 2013

Celsius to Fahrenheit!


Celsius to Fahrenheit Conversions


Ever get into a cook book with Celsius?  I know there are lots of “apps” out there that will help with the conversion, but ever wonder what the formula is?


Celsius X 1.8 + 32 = Fahrenheit


I realize that you may not want to do that, so I’ve done a few conversions for you.


Fahrenheit
Celsius
250
120
275
140
300
150
324
160
350
180
375
190
400
200
425
220
450
230


Sunday, September 29, 2013

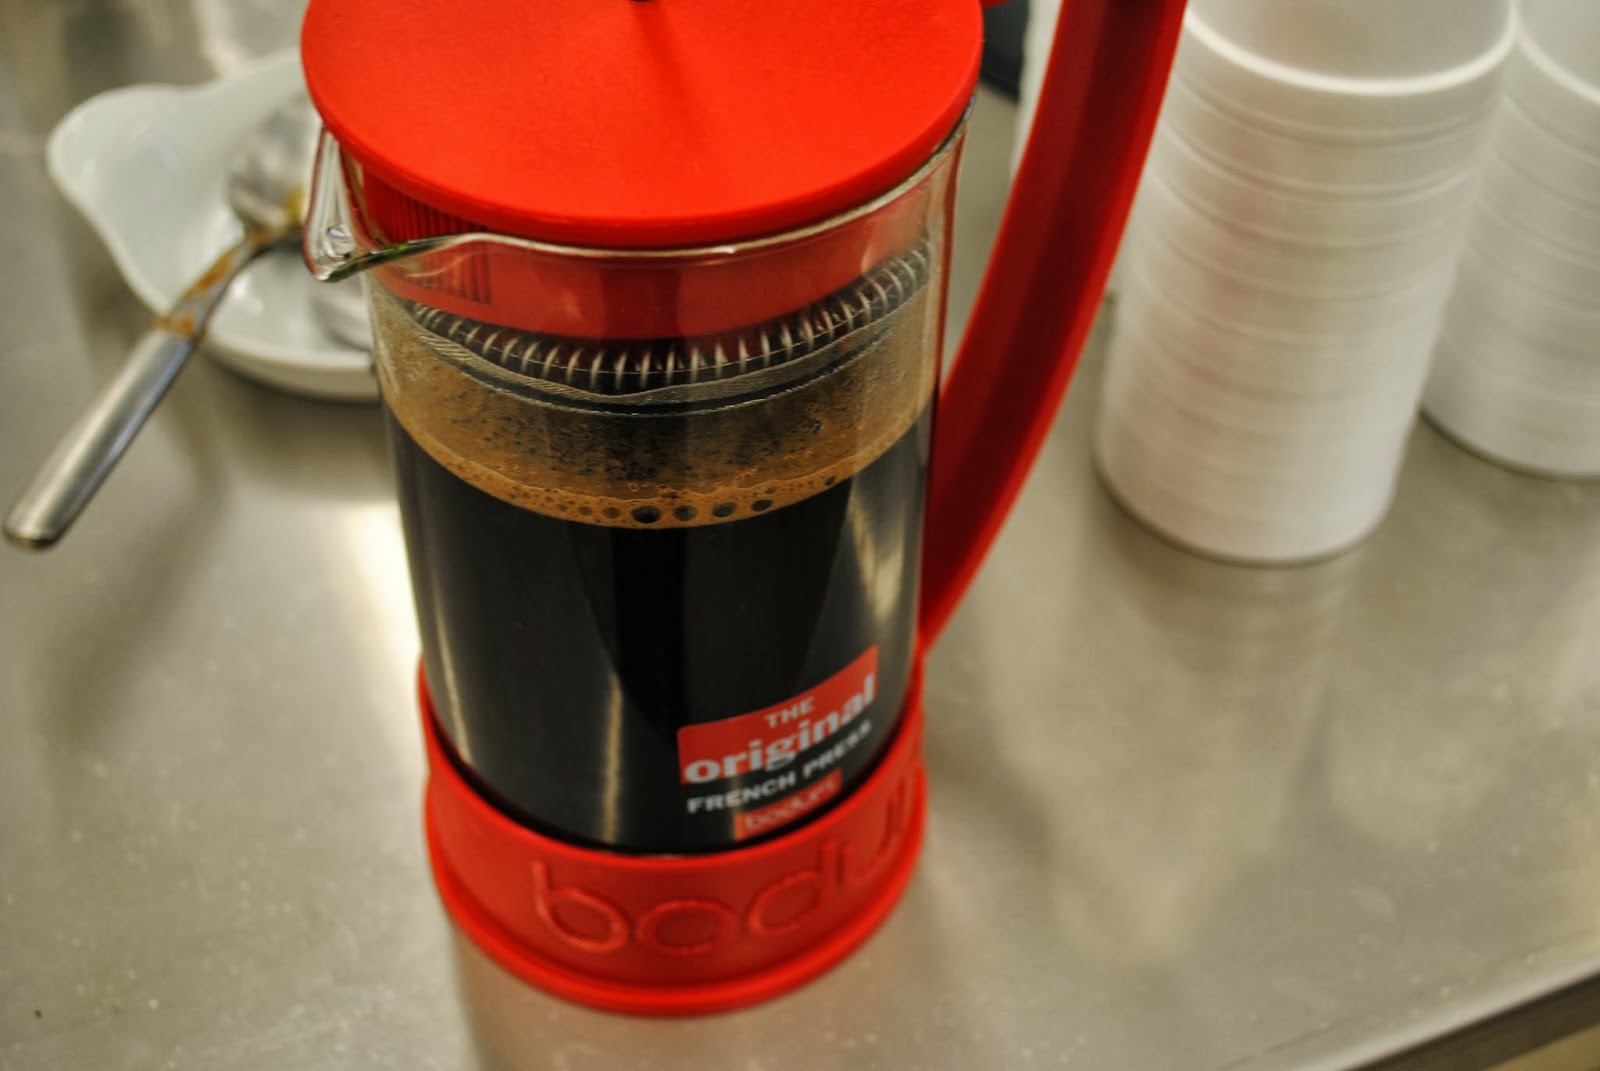
French Press Coffee


French Press Coffee


I do love a good cup of coffee.  I’m the first to admit though, that first thing in the morning, I just want to chug down some quick caffeine and get my day going.  At those times, I’m not doing designer coffee; I’m not adding extra calories with cream and sugar, it’s just pure unadulterated caffeine.  I’m actually trying to cut down a bit.
I own a French Press, and it’s bright Red!  I love colorful items, and it makes my heart happy.  I recently was able to demonstrate how easy and thoughtful making coffee in a French Press can be.  It’s not difficult.  It takes a bit of time, and there is a feeling of ritual.  Slows down the mind, body, and soul, and let’s you relax and be in the moment.  I need to do more of this.
Today, most coffee’s will tell you what the proper brew temperature and time is on the package, and they do lots of testing and research, so I try to follow the package.


Simply scoop the rough ground coffee of your choice into the bottom of your French Press. 
Add the water;
Stir with a wooden spoon


Cover


Let set for about 5 minutes


P

Press the plunger down slowly


Pour a great cup of coffee


Relax.


That’s it.


I have to start doing this more often


Enjoy your coffee today!  Enjoy your day!

Friday, September 6, 2013

Michigan Tomato Harvest


I love Tomato’s!


Yes I do!  But, I don’t like to can them.  I know, I know this is the time of year in Michigan where canning is very popular, but I have only my husband and myself at home, and really, I can get a good canned tomato at the store. 


But I do love tomatoes.   Our good friend Wayne has been letting us pick fresh tomatoes.  He has maybe 10 plants, all different types.  I brought home a bunch and thought, now what am I to do?

Oven dried tomatoes!  That’s what.  It’s easy, a couple of ingredients, a little bit of time in the oven (12 – 18 hours hands off) and you have oven dried tomatoes.  Pack them in Extra Virgin Olive Oil  - and that’s that! Done!  That’s just what I did. 


A lot of tomatoes, and a few good jars of very intense tomato flavor, stored in the refrigerator for a few months, and I’ll be “picking” them to add to soups, stews, and pastas.


All you need is lots of tomatoes.  Cleaned, cored and cut into roughly the same size pieces.


Cookie sheets, cooling racks, I suggest parchment paper, some salt and away you go!

I should’ve start at night time and woken to the smell of lightly roasting tomatoes, but I was to eager!!!!  So at about 170 degrees, and 18 hours or so later, packed in oil. 


All I can say is Yum!


Saturday, March 2, 2013

5 Easy tips


I plan parties and execute them for a living.  I’m passionate about food, plates, silverware, the setting – all of it.  It’s a good thing I do this for other people, because my husband couldn’t care less most of the time!  He doesn’t understand why I like the plates all in the same spot on the table setting, or the glasses in the correct corner.  What does that say?!  Every day meals at the Rees Residence are probably just like the ones at your house.


When I plan “big” parties for my clients I take the stress of this planning away from them.  Usually not all of it, my domain is the kitchen, the dining room, where ever there is food.  It’s usually at least 50% of the stress that they have.  Everyone loves the adrenaline rush that you get while preparing for a party, even my husband – he won’t admit to it, but I know that it’s true! They worry if the house is clean enough, do I have enough ice, what’s the weather going to be like, and everything in-between! 

I’ve seen long complicated check list.  I have a few that I make up for my events, and I wouldn’t even begin to suggest that you do this!  You know how much silverware you have, and where your glasses are! 

There are some things that you can do, and here are some easy tips to keep in mind.


5 Easy Tips

1.  I always try out the recipe before I actually try it on my guests! Why?  I need to know how it will taste – and so should you! I need to know how it will cook, and so should you!  And most important, I need to know how much time it will take me to get it done!

2.  Don’t go too complicated.  Not all of us are master chefs and sometimes simple with a few little tweaks are  great.

3.  Shop, Shop, Shop – make sure you have all of the recipe’s ingredients on hand – we call this mise en place. 

4. Taste your ingredients (or smell them) for freshness, and taste your meal as you go!  That’s the only way you’ll know how the finished product will turn out!

5.  Finish with a great (and easy) dessert!  It’s the last bite of the day, and that’s the one that they will all remember.