home mise tips events recipes photography

Sunday, May 26, 2013

Deep Fried Asparagus


Deep Fried Asparagus


Its asparagus season here in West Michigan!  I Love ASPARAGUS!  A client of mine wrote:


Hi Terri

You should try this.

This is an awesome appetizer at Joe's Stone Crab. I tried to duplicate at home and can't come close to the amount of Panko breading that I can get to stick when frying in a thin layer of olive oil. It is then rolled in the asiago.


Any ideas?

Thank you very much


Wayne Walkotten


The challenge was on.  I got close, it’s a lot harder to bread, fry, roll and photograph asparagus when you are cooking, and well, Wayne’s wife Kelly is an award winning photographer, and let’s say I was a bit nervous.  I’m close, not quite what they had but I think very close.  The difference:  Professional grade fryers at the restaurant compared to my little home fryer.


Here’s what I did.  I blanched my asparagus.  This technique is used to firm or soften your vegetables and to set the color.  Bring a large pot of salted water to boil – for once, I was a bit short on the salt – when it comes to a boil drop your asparagus in, bring back to a boil for about 1 minute, and then immediately immerse into ice cold water to stop the cooking process.


I then set up a standard breading station, seasoned flour (with s&p, aka salt and pepper) an egg wash, 1 beaten egg with water, and the panko.  Next time I’m going to add the cheese to the panko.  Wayne thought it was rolled in asiago but I’m not sure.


I put several pieces of asparagus into the flour, then to the egg mixture, and then rolled it in the panko, pressing firmly. 


First batch test fried!  A little weak on the coating, but tasty!


The second batch, I did a “double dip” – I started with the egg wash, then the flour, back to the egg wash and then to the panko.  It set much nicer.  I think if I would have let the asparagus set in the refrigerator to cool, it might have adhered better.  I’m going to try that next time.


I then deep fried my asparagus, let it drain for about 5 seconds and rolled it in the asiago.


Not bad, a bit closer, needs some work.  I definitely will add the asiago/shredded cheese directly into the panko, that’s how I do Parmesan Chicken!  I think it would work.  All in All a tasty snack for the day!


Ingredients

Asparagus

A bit of flour with salt and pepper added

1 egg beaten with water

Panko with asiago cheese!


That’s it!  I hope you enjoy – let me know how it works for you!


I

Sunday, May 19, 2013

Pan seared steak with rissotto


It has been an interesting week and a half.  My daughter Jennifer and her husband Colin came in (a.k.a the “kids” – though they are adults!)  Jeffery ran the riverbank, it was Mother’s day, my Aunt passed away, the dogs got sick at night and we had not one but two water leaks in the house.

There was a bunch of brightness in the week, though the temperatures plummeted.  We got three new friends – a new Weber Summit Grill and Smith & Wesson (ok that counts as one) – a bunch of ammo and I have a date night with my hubby this week to learn gun safety!


My amazing husband trained for the riverbank starting in January 2013 with the Striders run club.  Every Saturday, rain, snow, sleet or nice, he got out there and ran.  He lost weight, I gained weight!  I should’ve gone with him, but honestly, it didn’t seem like a hubby/wifely “let’s do this together” idea.

He ran it in darn good time, for an old guy!  He had some interesting stories once he caught his breath and finished.  To celebrate, I dug out some beef tenderloin left over from a previous party and finished out the dinner with some risotto: one of our favorites.
 

I pan seared my tenderloin steaks-just a little salt and pepper (or S&P as we call it in the industry!  It’s important that you have your pan ripping hot, and then put your steaks down.  They will caramelize nicely, you may need a touch of butter or oil, but that’s it.  Why ruin a good steak.


The risotto can be done so many different ways.  I know of people who tell me it’s to hard, time consuming and I don’t like to stir it!  Less than 30 minutes and Jeff and I sat down to dinner.


The goal in risotto (which is really a style of cooking normally thought of with Arborio or short grain rice) is to toast the rice, and the broth slowly until it absorbs one ladle at a time, and then nacre it (a fancy word for finish with butter) at the end.

I had to do something special for Jeff, he’s a special guy!


Risotto
Serves approximately 4
 
5 cups chicken stock - simmering
2 tablespoons oil
1 garlic clove crushed
1 leek, white part only sliced
1 fennel bulb thinly sliced
2 cups Arborio rice
½ cup freshly grated parmesan cheese


To make the risotto
Heat the oil and garlic in a large heavy based sauce pan, add the leek, and fennel – cook over medium heat until slightly browned.  Add the rice and stir for approximately 3 minutes, until translucent and smells kinda like popcorn.
 
Add the stock 1 cup at a time and stir constantly until the liquid is absorbed.  Continue adding liquid ½ cup at a time until all the stock has been incorporated, and the rice is al dente.  This will take about 30 – 40 minutes.  Remove from the heat and stir in the cheese.  Let cool slightly.
 
 
Note:  you may omit the fennel and the leek and use a medium white onion.  Risotto is very versatile, you can add mushrooms, asparagus, almost any vegetable about 5 minutes before it is done!


Thursday, May 9, 2013

Metro Health Farmers Market


Opening day at Metro Health Farm Market
Center of the market, what a gorgeous day!


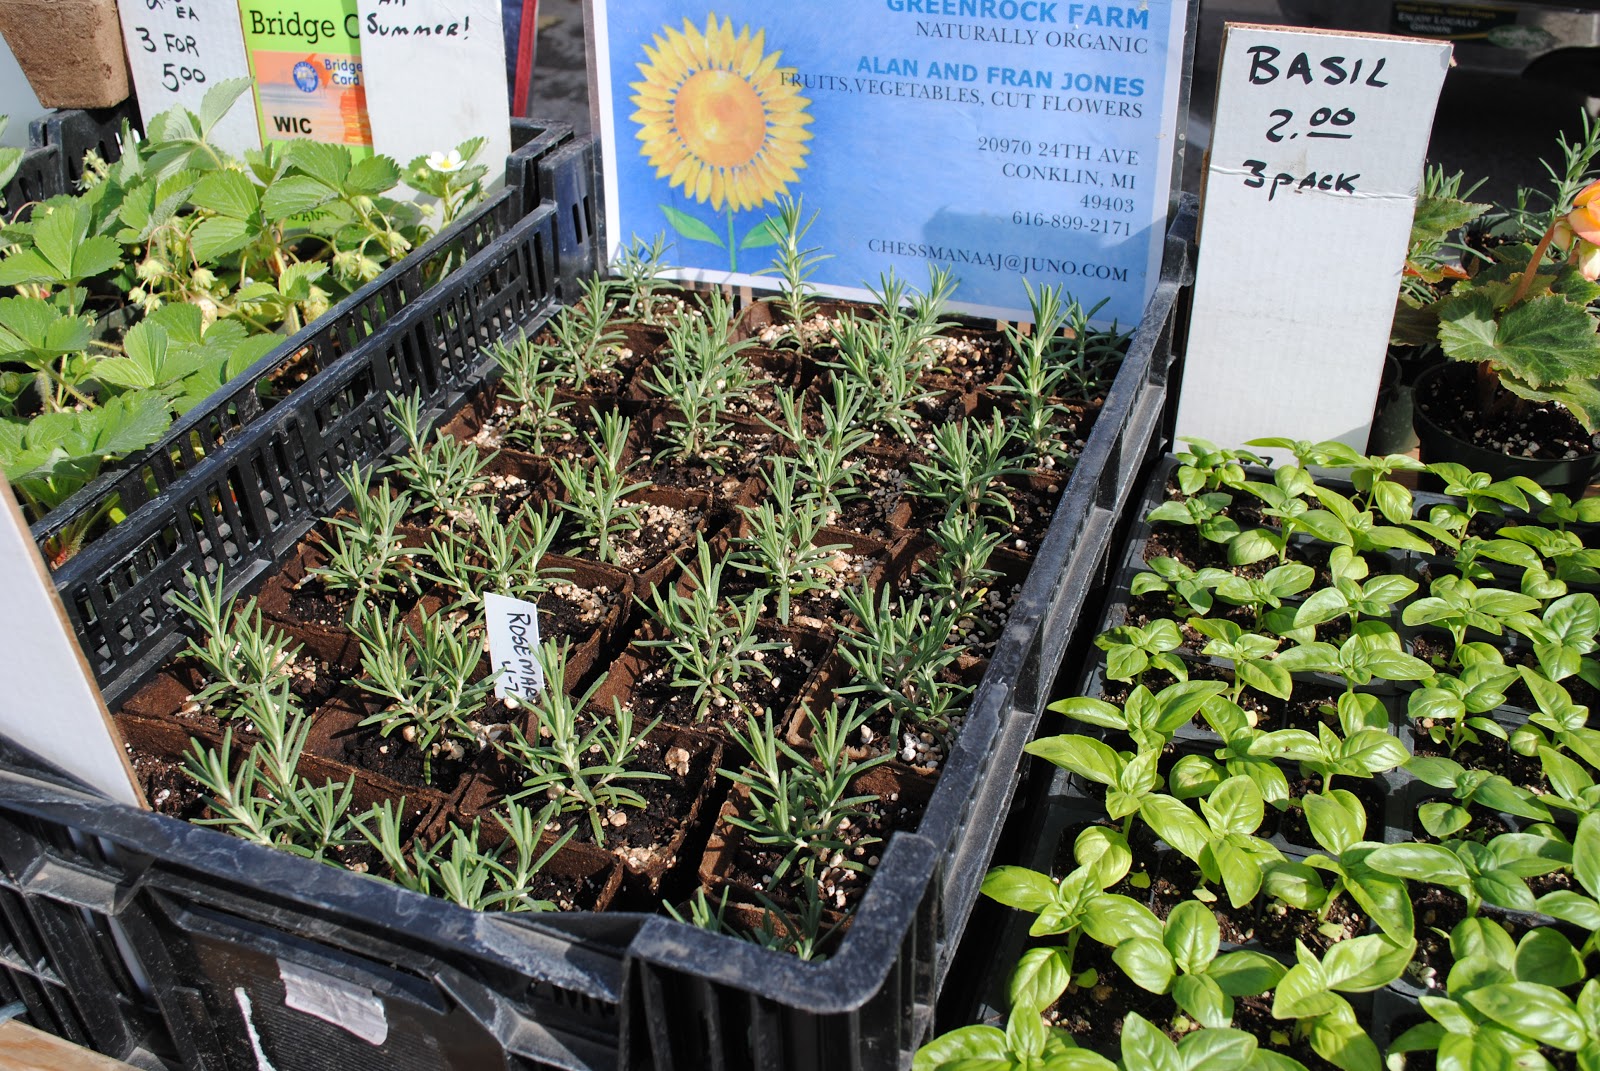
I love this market!  It’s close to home (I could walk, but this trip I didn’t!), they have lovely vendors, it’s not too big or crowded (yet), and it has really nice vendors! 

Last year I got to share the market with my mom several times, she’s 87 now and living in Florida with my older sister.  This visit, I really missed her, she grew up on a farm, and did organic gardening, before it was a “hip” term!  I remember the cow manure coming to the house on Groveland Ave, and it stunk up the whole neighborhood.  We forgot about it as kids, when we got to harvest all of the veggies.  More times than not, lots of it went into our mouths and not into the baskets and bags for dinner!  We didn’t worry about germs, dirt and bugs (well that’s not true; we all hated the bugs, except for my sister Sue!)


My mom would talk with the vendors, and taste a bit, and if I was lucky let me buy a few goodies for her. 


This year I went to scope it out on opening day – just to see what’s there, and I had the day off!  It’s going to be another great market!  I love the honey, and oils, and fresh veggies!  Little kids running around, and this year there was live music!  And I knew the song the guitarist was singing, The Tennessee Waltz!  I’m sure not to many of you know that song! 
 

I was looking at all of the hanging baskets, and fresh herb plants!  Oh how I wanted some, but I haven’t really planned out my garden space yet, this weekend I will and then – watch out, I’ll be buying some!


If you get a chance, check out your local farmers markets!  There are lots of them around town now, and nothing beats knowing where you’re food came from and talking with people who lovingly grew, gathered, picked and harvested your food.


Sunday, May 5, 2013

Cinco De Mayo 2013


Cinco De Mayo


Yesterday I taught a class in “Mexican” Cuisine in honor of Cinco De Mayo.   Really, I thought it was an Independence day celebration, but when I researched the day, it’s in remembrance of The Day of the Battle of Puebla  which occurred in 1862.   This was a battle of Mexican’s unlikely victory over French forces!  Mexican’s “independence day” is actually celebrated on September 16th!


Needless to say, some of you know that I am polish by heritage, and I love Mexican food.  I went to some true sources; recipes that my friend from culinary school Juan Carlos has given me, Patty’s Mexican Table, and my all time favorite Rick Bayless.  I always give credit where credit is due!


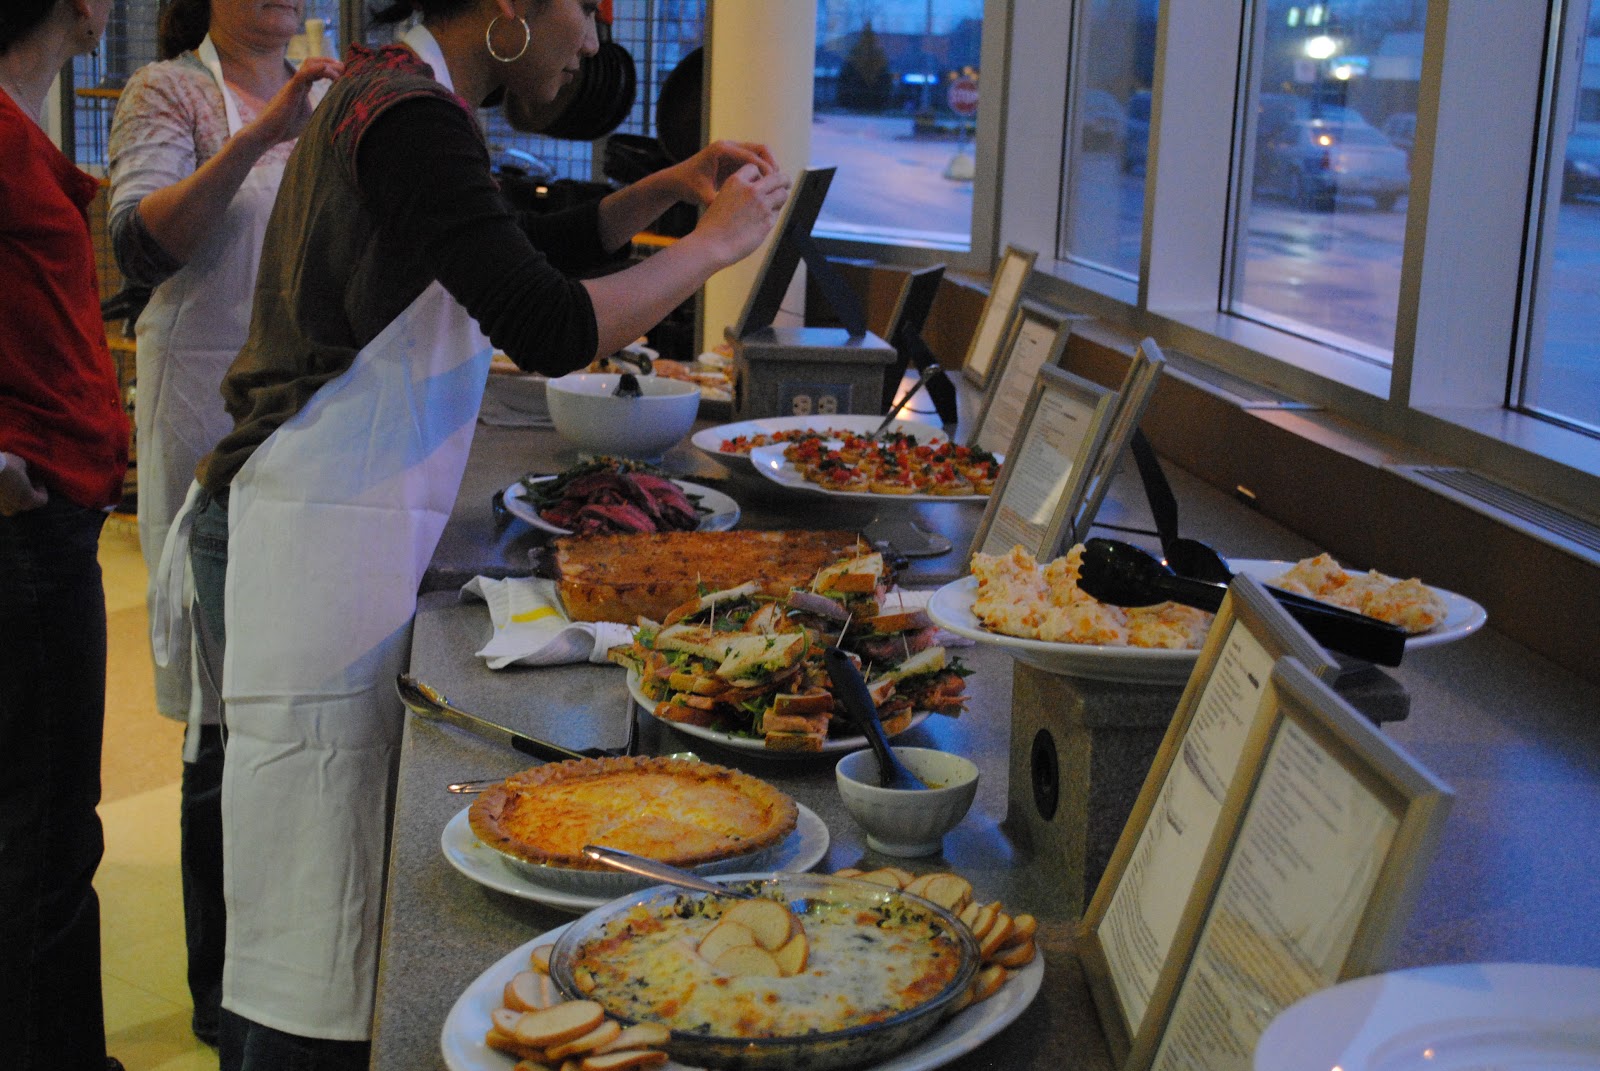
If you haven’t been a regular of my classes at Spartan Stores, you should!  The students start scoping out the recipes early, in search of what they may want to try making. Everyone gets to taste all of the recipes, and bring a packet of recipes home with them, sometimes we even have leftovers!  The experience allows you to taste recipes, well frankly, that you may not have thought of before! 


The day’s recipes were, well rather aggressive for the time period.  A class generally is 3 hours long, including the best part, the tasting!  We had lots of chicken and pork shoulder to cook, and some short cuts were taken!  We also tried our hands on two different tamales, and well – we surprised ourselves with the results!  They were rather tasty.


One of my favorites is the cold Chicken and Avocado Salad with Chipotle Chile.  Long title, but a wonderful salad and I hope that you get an opportunity to try it sometime soon!


Cold Chicken and Avocado Salad with Chipotle Chile


Pollo, Aguacate y Chile Chipotle en Frio

Yield: about 3 1/2 cups, enough for 12 tacos, serving 4 as a light main course

The chicken for this salad can be prepared 1 or 2 days in advance and then mixed with the dressing just before serving. Great for a summer picnic.


Also, buy the chicken “pre-cooked”  a roasting chicken from the store is a great way to save some time!  This can be served as a salad, or as a filling for tacos!


Ingredients

1 chicken leg-and-thigh quarter or 1 large breast half
1/2 teaspoon salt
2 small (about 6 ounces total) boiling potatoes like the red-skinned ones, halved
2 medium (about 6 ounces total) carrots, peeled and cut into 1 1/2-inch lengths
1/4 cup cider vinegar
1 teaspoon dried oregano
1/2 teaspoon salt
2 to 4 canned chiles chipotles, seeded and thinly sliced
1/4 small onion, finely diced
4 large romaine lettuce leaves, sliced in 3/8-inch strips, plus several whole leaves for garnish
1 ripe avocado, peeled, pitted and diced
1/4 cup vegetable oil
1 slice of onion, broken into rings, for garnish


Directions

1. The chicken mixture. Bring 2 cups water to a boil in a medium-size saucepan, add the chicken and salt, skim off the foam that rises as the water returns to a boil, partially cover and simmer over medium heat—23 minutes for the dark meat, 13 minutes for the breast. If there is time, cool the chicken in the broth.

Boil the potatoes and carrots in salted water to cover until they are just tender, 12 to 15 minutes. Rinse for a moment under cold water, strip off the potato skins, if you wish, then cut the potatoes and carrots into 3/8-inch dice. Place in a large mixing bowl.

Skin and bone the chicken, then tear the meat into large shreds and add to the potatoes. Skim off all the fat on top of the broth, then measure 3 tablespoons of broth into a small bowl. Stir in the vinegar, oregano and salt. Pour the dressing over the chicken mixture and add the sliced chiles chipotles and chopped onion. Stir, cover and let stand for 45 minutes, refrigerated or at room temperature.

2. Finishing the dish. Shortly before serving, mix the sliced lettuce and diced avocado into the chicken mixture. Drizzle with oil and toss lightly. Taste for salt. Line a serving platter with the remaining romaine leaves and pile on the chicken mixture. Decorate with the onion rings and serve.


Ingredients
Chiles Chipotles: In Mexico City, dishes like this often utilize pickled (not adobo-packed) chipotles. Without any chipotles at all, this dish loses many of its special qualities, though a nice salad can be made using pickled jalapeños and chopped fresh coriander (cilantro), if desired.

Timing and Advance Preparation
The active preparation time is less than 45 minutes, though you’ll need to start a couple of hours before serving. The chicken mixture can marinate overnight, covered and refrigerated; complete the final dressing within 15 minutes of serving.


Sunday, April 28, 2013

Herb Brined Chicken


Herb Brined Chicken – The Smart Way


Recently, I had the honor of working with Café Tecumseh – Smart Chicken at the Spartan Culinary Classroom.  They treated the classroom to a free demonstration featuring the Organic Smart Chicken, that is air chilled.

For more information please go to:  https://www.cafetecumseh.com/SmartChicken/


Susan and Doug supplied us with answers to all of our questions and handed out some nifty give a ways – tote bags and aprons for all of the attendees!


Though I was demonstrating, I did get several of our guests to help me remove the wishbone prior to roasting, and I did get some of them to break down a whole chicken.  After one person got started, well, the others joined right in to find out how easy it can be.  Why remove the wishbone?  It makes it easier to care.  With the Smart Chicken breast side up, use your chef’s knife to “scrape” the wishbone, and then using your thumbs (notice plural, use both of them) as guides remove the bone.  This will make carving the bird much easier.


Our menu for the evening


Thai Chicken Lettuce Wraps

Chicken & wild Rice Soup

Not so Swedish Meatballs

Spatchcock Chicken with tomato cream sauce

Herb Brined Chicken


One of the surprising moments of the evening was taking the chicken out of my cooler!  Yes, I brine chicken in a beverage cooler, it saves space that you may not have in your refrigerator!


Believe it or not, the chicken is in there!

I have to say, it’s hard to stop and take pictures of your products when everybody wants some, but, I did get a picture after we carved into them!  They were wonderful.


Brining is a mixture of salt, sugar and aromatics.  It helps make your chicken (or turkey) juicy and delicious, and it will not become SALTY!


Herbed Brined Chicken

This recipe works equally well when roasting a whole chicken or with chicken breasts and thighs on the grill. Make sure the chicken is covered with brine and refrigerated until ready to cook.

For a
large whole chicken, use the brine recipe as listed. For 4 to 6 pounds of cut up chicken thighs and/or breasts, halve the brine recipe.

2 gallons water
6 ounces kosher salt
6 ounces granulated sugar
2 carrots, diced
2 celery stalks, chopped
2 leeks, whites only, sliced
4 fresh bay leaves (or 2 dried)
1 to 2 tablespoons black peppercorns
1/2 bunch flat leaf parsley, washed and whole on stem
1/4 teaspoon red pepper flakes
1 teaspoon fennel seeds
2 star anise
4 to 6 sprigs fresh thyme

Bring the water to the boil in a large stainless steel pot. Add salt and sugar and stir until dissolved. Turn off the heat and add all remaining ingredients except the chicken. Refrigerate until the brine is cold. Add the chicken, weighing it down with a plate so that it remains submerged in the brine. Refrigerate for 24 to 72 hours.

Cook the chicken until internal temperature reaches 165ºF and juices run clear. Remove from heat and let sit for 5 to 10 minutes before serving.


After you remove the chicken for roasting, make sure that you pat it dry completely; this will help the chicken brown while baking and not steam.


Try brining some chicken soon!  You’ll enjoy the difference that it makes.


Sunday, April 21, 2013

Marinated Flank Steak with Green Beans Gremolata


Mustard Marinated Flank Steak w/ Green Beans Gremolata
 
I love food.  It’s really that simple.  And I love to share my love of food, which can be “simple” food in my eyes, and in the eyes of my guest at the Spartan Culinary Classroom, complex.
Not this last Friday Night.  We had Girls Night Out, The Diva’s of the food network.  I chose Paula, Ina, and Giada.  I know, I know – they’re a lot of additional choices to pick from, but I limited myself to those three. 
Friday nights in the classroom, is all about good friends and food, and this past Friday was no different.  In west Michigan, we are suffering from a flood, and it took time for some of our guest to get form work to the event.  Lots of reroutes on the expressways and side streets, but all arrived safe and sound, and ready to have a bit of fun.
 
I always like to remind my guests that this is supposed to be fun, and that any mistakes can be fixed.  I usually tell them that if we do “goof up a bit” that it will allow us to create a new and exciting recipe.  I’m proud to say that we had wonderful food, and it was all delicious.
 
It’s hard to pick favorites, all of my guests did wonderful, but the Mustard Marinated Flank Steak, was cooked to almost perfection.  And after a bit of explaining what “against the grain” meant, we had it sliced and mounded on a wonderful platter.  Served with Green Beans Gremolata – which is a mixture of chopped parsley, garlic, and grated lemon zest, made the perfect finishing touch.  Both of the recipes are compliments of Ina Garten, and I’m sure they will become favorites of yours.
 

Mustard Marinated Flank Steak

Ina Garten
serves 4
 
1 flank steak
2  - 2 ½ pounds
1/3 cup dry white wine
1/3 cup good olive oil
1/3 cup Dijon mustard
kosher salt and freshly ground black pepper
1/3 cup chopped shallots (about 2)
1 tablespoon minced garlic
2 tablespoons coarsely chopped fresh tarragon leaves
Extra Kosher Salt, and good EVOO for drizzle at finish
 
Place the steak flat in a large nonreactive dish.  Using the tip of a sharp knive, lightly score the top of the steak diagonally in a large crisscross pattern to make what looks like 1 inch diamonds across the streak.  This allows the marinade to penetrate into the meat
 
In a 2 cup measuring cup, whisk together  the wine, olive oil, mustard 1 teaspoon salt and ½ teaspoon pepper.  Stir in the shallots and garlic.  Pour the marinade over and under the steak until it’s completely coated.  Scatter the tarragon on top.  Cover the dish with plastic wrap and allow to marinate for at least 2 hours, or overnight (we’ll only be able to marinate about 1 ½ hours in class – it’ll be fine!)
 
½ an hour before serving remove the steak and let to come up to room temperature.  Using a grill pan, or a charcoal/gas grill set to medium high, warm the grill.  Sprinkle the steak with 1 teaspoon salt and pepper.  Discard the marinade.
 
Grill the steak about 5 minutes per side for medium-rare.  Place steak on a clean plate and cover with aluminum foil, and allow to rest for 10 minutes.  Slice the steak thin, cutting diagonally across the grain.  Finish with a good kosher salt , light drizzle of evoo and serve hot.

 Green Beans Gremolata

 
Ina Garten
 
 
Makes 4 to 6 servings
 
 
Ingredients
 •1 pound French green beans (haricots verts), trimmed
•2 Tbsp. pine nuts
•2 tsp. minced garlic (2 cloves)
•1 Tbsp. grated lemon zest (from 2 lemons)
•3 Tbsp. minced fresh flat-leaf parsley
•3 Tbsp. freshly grated Parmesan cheese
•2½ Tbsp. good olive oil
•Kosher salt
•Freshly ground black pepper
 
Directions
 Total time: 20 minutes
 
 Bring a large pot of water to a boil. Add green beans and blanch 2 to 3 minutes , until tender but still crisp. Drain beans in a colander and immediately put them in a bowl of ice water to stop the cooking and preserve their bright green color.
 
 Place pine nuts in a dry sauté pan over low heat and cook 5 to 10 minutes, stirring often, until lightly browned. Set aside.
 
 To make gremolata, toss garlic, lemon zest, parsley, Parmesan, and pine nuts together in a small bowl and set aside.
 
 When ready to serve, heat olive oil in a large sauté pan over medium-high heat. Drain beans and pat dry. Add beans to skillet and sauté, turning frequently, 2 minutes, until coated with olive oil and heated through. Remove from heat, add gremolata, and toss well. Sprinkle with ¾ tsp. salt and ¼ tsp. pepper to taste and serve hot.
 

Sunday, April 14, 2013

Home grown in Michigan


Grown in Michigan &  cooked in Michigan!


How much more local can I get for today’s dinner?  Steak from Byron Center Meats (rib eyes), Michigan grown potato’s and Jeff’s Corn, that was grown near Manistee and loving preserved in two portion bags!


Oh, and the grill that I’ve been complaining about and want to replace.!  Why you ask?  Well take a look at these two steaks.  Both on at the same time, both the same size and …….welll you get the idea.


Both in the center of the grill, both with definetly different coloring!  Yowser!  I need a new grill!


I’m searching for my next, and hopefully last grill and there is so much new technology out there, that well I’m frustrated, so I decided to grill dinner.


I want you to notice the steaks.  One is crispy burnt, and the other hasn’t got it’s carmelization yet!  That’s because, even though my grill has new briquettes from last year, it has never, ever had an even heat.  I realize the edges of the grill will be cooler, but come on now, the center of my grill?


Rib Eye Steaks with caramelized onions, baked potato (with crunchy skins, not the soft soggy kind!) and Jeff’s family corn – that’s what dinner is all about!  The corn was bagged and frozen last September and the rule in the Jeffery Rees family, you can’t get into it, unless it snows first, and then it’s fair game.  We tend to grudgingly dole it out, in fact we shared some on Easter Sunday with my sister Sue and her husband Phil! 

Even with the grill issues, dinner was lovely, and even the dogs got a little bite.

Next week, I promise a real recipe. 


Chef Terri Rees