home mise tips events recipes photography

Sunday, April 21, 2013

Marinated Flank Steak with Green Beans Gremolata


Mustard Marinated Flank Steak w/ Green Beans Gremolata
 
I love food.  It’s really that simple.  And I love to share my love of food, which can be “simple” food in my eyes, and in the eyes of my guest at the Spartan Culinary Classroom, complex.
Not this last Friday Night.  We had Girls Night Out, The Diva’s of the food network.  I chose Paula, Ina, and Giada.  I know, I know – they’re a lot of additional choices to pick from, but I limited myself to those three. 
Friday nights in the classroom, is all about good friends and food, and this past Friday was no different.  In west Michigan, we are suffering from a flood, and it took time for some of our guest to get form work to the event.  Lots of reroutes on the expressways and side streets, but all arrived safe and sound, and ready to have a bit of fun.
 
I always like to remind my guests that this is supposed to be fun, and that any mistakes can be fixed.  I usually tell them that if we do “goof up a bit” that it will allow us to create a new and exciting recipe.  I’m proud to say that we had wonderful food, and it was all delicious.
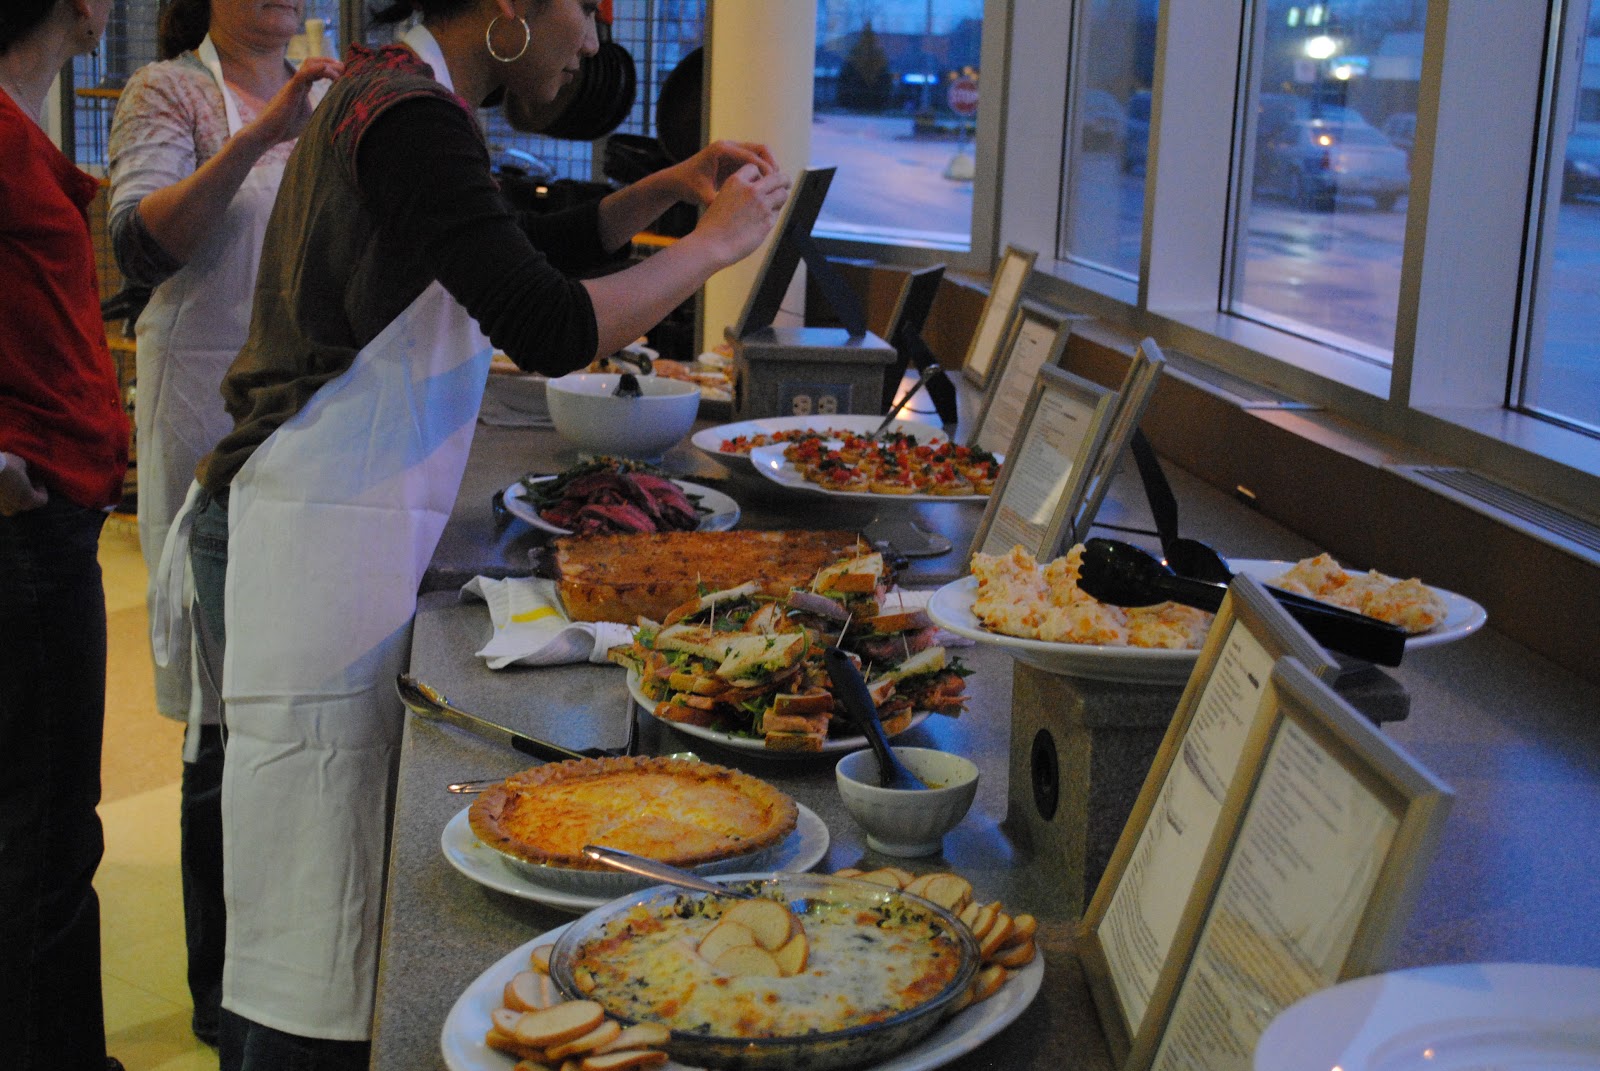
 
It’s hard to pick favorites, all of my guests did wonderful, but the Mustard Marinated Flank Steak, was cooked to almost perfection.  And after a bit of explaining what “against the grain” meant, we had it sliced and mounded on a wonderful platter.  Served with Green Beans Gremolata – which is a mixture of chopped parsley, garlic, and grated lemon zest, made the perfect finishing touch.  Both of the recipes are compliments of Ina Garten, and I’m sure they will become favorites of yours.
 

Mustard Marinated Flank Steak

Ina Garten
serves 4
 
1 flank steak
2  - 2 ½ pounds
1/3 cup dry white wine
1/3 cup good olive oil
1/3 cup Dijon mustard
kosher salt and freshly ground black pepper
1/3 cup chopped shallots (about 2)
1 tablespoon minced garlic
2 tablespoons coarsely chopped fresh tarragon leaves
Extra Kosher Salt, and good EVOO for drizzle at finish
 
Place the steak flat in a large nonreactive dish.  Using the tip of a sharp knive, lightly score the top of the steak diagonally in a large crisscross pattern to make what looks like 1 inch diamonds across the streak.  This allows the marinade to penetrate into the meat
 
In a 2 cup measuring cup, whisk together  the wine, olive oil, mustard 1 teaspoon salt and ½ teaspoon pepper.  Stir in the shallots and garlic.  Pour the marinade over and under the steak until it’s completely coated.  Scatter the tarragon on top.  Cover the dish with plastic wrap and allow to marinate for at least 2 hours, or overnight (we’ll only be able to marinate about 1 ½ hours in class – it’ll be fine!)
 
½ an hour before serving remove the steak and let to come up to room temperature.  Using a grill pan, or a charcoal/gas grill set to medium high, warm the grill.  Sprinkle the steak with 1 teaspoon salt and pepper.  Discard the marinade.
 
Grill the steak about 5 minutes per side for medium-rare.  Place steak on a clean plate and cover with aluminum foil, and allow to rest for 10 minutes.  Slice the steak thin, cutting diagonally across the grain.  Finish with a good kosher salt , light drizzle of evoo and serve hot.

 Green Beans Gremolata

 
Ina Garten
 
 
Makes 4 to 6 servings
 
 
Ingredients
 •1 pound French green beans (haricots verts), trimmed
•2 Tbsp. pine nuts
•2 tsp. minced garlic (2 cloves)
•1 Tbsp. grated lemon zest (from 2 lemons)
•3 Tbsp. minced fresh flat-leaf parsley
•3 Tbsp. freshly grated Parmesan cheese
•2½ Tbsp. good olive oil
•Kosher salt
•Freshly ground black pepper
 
Directions
 Total time: 20 minutes
 
 Bring a large pot of water to a boil. Add green beans and blanch 2 to 3 minutes , until tender but still crisp. Drain beans in a colander and immediately put them in a bowl of ice water to stop the cooking and preserve their bright green color.
 
 Place pine nuts in a dry sauté pan over low heat and cook 5 to 10 minutes, stirring often, until lightly browned. Set aside.
 
 To make gremolata, toss garlic, lemon zest, parsley, Parmesan, and pine nuts together in a small bowl and set aside.
 
 When ready to serve, heat olive oil in a large sauté pan over medium-high heat. Drain beans and pat dry. Add beans to skillet and sauté, turning frequently, 2 minutes, until coated with olive oil and heated through. Remove from heat, add gremolata, and toss well. Sprinkle with ¾ tsp. salt and ¼ tsp. pepper to taste and serve hot.
 

Sunday, April 14, 2013

Home grown in Michigan


Grown in Michigan &  cooked in Michigan!


How much more local can I get for today’s dinner?  Steak from Byron Center Meats (rib eyes), Michigan grown potato’s and Jeff’s Corn, that was grown near Manistee and loving preserved in two portion bags!


Oh, and the grill that I’ve been complaining about and want to replace.!  Why you ask?  Well take a look at these two steaks.  Both on at the same time, both the same size and …….welll you get the idea.


Both in the center of the grill, both with definetly different coloring!  Yowser!  I need a new grill!


I’m searching for my next, and hopefully last grill and there is so much new technology out there, that well I’m frustrated, so I decided to grill dinner.


I want you to notice the steaks.  One is crispy burnt, and the other hasn’t got it’s carmelization yet!  That’s because, even though my grill has new briquettes from last year, it has never, ever had an even heat.  I realize the edges of the grill will be cooler, but come on now, the center of my grill?


Rib Eye Steaks with caramelized onions, baked potato (with crunchy skins, not the soft soggy kind!) and Jeff’s family corn – that’s what dinner is all about!  The corn was bagged and frozen last September and the rule in the Jeffery Rees family, you can’t get into it, unless it snows first, and then it’s fair game.  We tend to grudgingly dole it out, in fact we shared some on Easter Sunday with my sister Sue and her husband Phil! 

Even with the grill issues, dinner was lovely, and even the dogs got a little bite.

Next week, I promise a real recipe. 


Chef Terri Rees


Wednesday, April 10, 2013

The art of the omelet

Saturday April 27, 2013 I will be at Rylees Ace Hardware, 1234 Michigan Ave NE, Grand Rapids, MI from 10 am to 11 am. 

I'll be demonstrating the "art of the omelet" a skill that I learned while at GRCC's Culinary School.  I got to watch the Guisness Book of world record holder Howard Helmer make omelets.  It was a break for us at school, but actually, I learned how to make omelets. 

You can too!  Come join me for this free demonstration - you might learn a trick or two!

Thanks

Chef Terri Rees

Sunday, April 7, 2013

Springtime Salads


It’s springtime and my waistline says I’ve been not too good all winter long.  It’s hard (such a cliché I know) I work in a Dining Hall kitchen from 6 am to around 2:30 pm, and it’s all around, plus I have to taste a lot of the food.

As a chef, I have the worst eating habits:  I stand up when I eat:  I eat while walking: I taste constantly: I never eat a balanced and slow meal at work.

Last year I did some healthy classes for Spartan Culinary Classroom and Spectrum Health, and I revisited two of the recipes – Quiona Tabbouleh and salad in a jar.

Quiona Tabbouleh

Quiona (keen-Wa) is one of the “new” ancient seeds that you see in the stores.  It is the seed of a South American plant and used like a grain.  Light in texture, cooks like rice, and the quinoa’s tiny pearls reveal the spiral germ.  Tabbouleh  is a Lebanese dish usually made with Bulghur, which is a wheat product, using the Quiona I make mine gluten free.


 8 servings

8 ounces Keen-wah (1 cup)

½ cup diced onions

2 – 3 green onions sliced on a bias

¼ cup chopped fresh parsley

¼ cup chopped fresh mint

½ cup olive oil

½ cup lemon juice

½ pound tomato concassee*

Salt and pepper to taste

¼ cup pine nuts toasted**


Cook the Quinoa  according to package directions and set aside to cool slightly.


Mix the onions, green onions, parsley, mint, olive oil, and lemon juice.  Mix well with the Quinoa.  Add the tomato  concassee and mix to combine.  Season with salt and pepper. 


Garnish with the toasted pine nuts.


*Procedure for preparing tomato concassee: With a paring knife, mark an X on the bottom of the tomato jut deep enough to penetrate the skin.  Blanch the tomato in boiling water for about 20 seconds; refresh in ice water.  Using a paring knife, cut out the core and peel the tomato.  Cut the tomato in half horizontally and squeeze out the seeds and juice.  Chop or dice the tomato.


**to toast the pine nuts:  heat a sauté pan over medium heat, add pine nuts and swirl until toasted.  This will go fast, so be careful.


Get out your Mason Jars (or any jars that you have) and let your kids (and you) make Salad in a Jar!

It’s easy, and fun, and there really is no recipe, just some ideas to spruce up, lighten up and make creating a lunch time salad, a little more fun.  I’ve been told a couple of my “students” from the class have used this, and made several salads in advance, and pick one for the day.  Here’s a couple that you can try the Greek Pasta Salad and the Greek Chickpea Salad!  Try Caprese, or any other kind that you like!


Greek Pasta Salad


2 tbsp easy lemon vinaigrette (see below)

1 cup cherry tomatoes

¼ cup red onion, chopped

1 cup cucumber, chopped

½ cup feta, crumbled

2 oz rigatoni, cooked

½ cup mixed greens

½ cup fresh mint, chopped


Easy Lemon Vinaigrette


(will make enough for 3-4 mason jars)

Juice from one large lemon

½ cup olive oil

Good pinch of salt

Couple of grinds of black pepper

Shake all ingredients together in a small container.

Speaking of shaking, try to remember to leave room at the top of each jar. Don’t worry if you get a little over zealous (I usually am!) with your ingredients though—just shake the jar like crazy when you’re ready for lunch, eat a few bites, then shake some more once there’s a bit more room!


Greek Chickpea Salad


2 teaspoons olive oil

Squeeze of lemon juice (the juice of 1/4 of a small lemon)

Sea salt and freshly ground black pepper

Pinch red pepper flakes

1 clove garlic, minced

1/2 cup cooked chickpeas

Small handful cherry tomatoes, chopped (about 1/2 cup)

8 Kalamata olives, chopped

2 tablespoons red onion, chopped

1/2 roasted red pepper, chopped (about 1/3 cup)

1/3 to 1/2 cup fresh parsley, chopped

Crumbled feta (optional)

Fills one pint-sized mason jar.


Sunday, March 24, 2013

Wok Crazy


Wok Like Crazy

or San Choy Bau with Noodles

It’s been a whirlwind week!  Wok Crazy Class at Spartan Stores, a private dinner/iron chef competition, and I’m working on my new business cards!  Oh, and my full time Sous Chef job at Creative Dining Services!

I’m going to focus on my Wok Class, I had a varied group of culinarians in the classroom at Spartan Stores this week, from first timers to veterans, some who had a wee bit of cooking chops, and some that had none.  My friend here had lots of experience!


It’s always fun when you try and herd 20 potential chef’s and home cooks in a small environment, but we have learned how to do it well over the last 5 or so years.  Everything from  “well it says simmer on the  button, doesn’t that mean it’s simmering?” to how many rice papers can I soak at one time, and what are prawns?  (shrimp).”


We get all kinds of questions, and answer all kinds, and offer advice, shortcuts and suggestions. 


My mantra in this class like setting: “there are no mistakes, only opportunities to create new recipes!” This usually settles the group down, and they begin to smile. We had so much fun food, but I think my favorite was the San Choy Bau with noodles. The noodles made it fun! We didn’t have the lettuce to make “lettuce cups” that sometimes happens, produce can be tricky and we only want to use the best, so we made it platter style. The fried vermicelli noodles made the dish festive. I hope you like the recipe.

 San Choy Bau with Noodles


1lb raw prawns

vegetable oil for deep frying

3 ½ oz dried rice vermicelli *

¼ cup chicken stock

2 tablespoons rice Wine

2 tablespoons soy sauce

1 tablespoon brown bean sauce

2 tablespoons hoisin sauce

½ teaspoon sugar

peanut oil as needed

1 garlic clove crushed

1 tablespoon finely chopped fresh ginger

3 scallions, thinly sliced and green ends reserved to garnish

6 ounces minced pork**

12 iceberg lettuce leaves, trimmed into neat cups


Serves 6


Peel the prawns and gently pull out the dark vein from each prawn back and roughly chop


Fill a deep heavy based saucepan  or deep fryer one third full of peanut oil and heat to 325 degrees or until a cube of bread dropped into the oil browns in 20 seconds.  Add the dried rice vermicelli to the oil in batches and deep fry until puffed up but not browned.  This will take only a few seconds, so watch closely.  Remove using a slotted spoon and drain well on paper towels.


Stir Fry sauce:  Combine chicken stock, rice wine, soy sauce, hoisin sauce, brown bean sauce, sugar and ½ teaspoon salt in a small bowl and combine.


Heat the peanut oil in a wok over high heat and swirl to coat.  Add the garlic, ginger, and spring onion and stir fry for 1 minute, being very careful not to burn the garlic.


Add the pork to the wok, breaking up the lumps with the back of a wooden spoon and cook for about 4 minutes, then add the shrimp and cook until the shrimp turn lightly pink, about 2 minutes.


Add the stir fry sauce and stir until combined, cook over high heat for 2 minutes, until the sauce thickens slightly.


Divide the noodles among the lettuce cups, spoon the pork and prawn mixture over the noodles and garnish with the reserved spring onion.  Service at once


·          make sure the pork mince is not to lean or the mixture will be dry, you need some fat to make this dish work well.

When deep frying the vermicelli, take care not to allow the oil to become to hot as the vermicelli will burn.


Beautiful!

Saturday, March 16, 2013

Blueberry Muffins


The importance of Weighing Ingredients in Baking


Muffins.  A simple baked treasure where you mix all of the wet ingredients into the dry ingredients, scoop it into muffin tins and bake.  Easy, right?

I was at Rylees Ace Hardware in Grand Rapids, MI on March 16, 2013 with a group of my favorite customers, and I was showing them how to make muffins.  I may have driven a few of them crazy, because the recipe had no “normal” measurements to work from.  No cups, no teaspoons, no tablespoons, only weights.  And it is hard to take pictures while you work,  but I got the beginning and the finished product.  I hope you like!


I started out by asking two of favorites to measure out 1 cup of all porpoise flour.  The old saying “a pint a pound the world around “came to mind because a cup of flour should be about 8 ounces, right?  Well I got several different answers when I weighed them using the nifty digital scale that Rylees had.  an ounce difference between the two who scooped, sifted, spooned, etc.  See how little the digital scale is?  It's that white triangle shaped contraption.  I love it, and I gotta get one of those little ones!


So we weighed out the following ingredients:


1 lb 4 ounces all purpose flour

10 ounces sugar

1.25 ounces baking powder

Pinch of salt


Then we stirred it up really well.  If anything had been extremely lumpy I would have sifted the ingredients, but all purpose flour is pre-sifted, and the sugar wasn’t lumpy, then we set it aside and:


Measured out:


6 oz eggs, beaten

14 ounces milk (whole milk – unless otherwise suggested)

½ ounces vanilla extract

8 ounces butter – melted and slightly cooled:


Of course it was more than two 4 ounce sticks of butter.  The day before I was short ½ an ounce, so I melted 3 sticks, and we actually weighed it out.


We had a discussion on eggs – what kind of eggs?  If a recipe calls for 3 eggs, in the home cooking world, it usually doesn’t say medium, or large, or extra large.  I beat the eggs, and weighed it out!


Then someone asked me if we could use skim milk, and I said yes, but it would affect the muffin, and you wouldn’t have the same muffin.  It’s the fat content that we have in the milk that’s important.  Substituting ingredients will work, but the product will be slightly different.


We then mixed in


10 ounces of blueberries


And by hand with a wooden spoon, I mixed them together until it was slightly lumpy!


Then we placed the papers in the muffin tins and sprayed tem to get the muffins out easily.  You could just spray the muffin tins, but I wanted to make clean up easy.  I used a number 20 scoop. 


That led to the discussion on what was the yield?  And I said it depends.  Of course that got me some looks.  I explained how scoop numbers (there is a number on the inside half ring, or on the outside somewhere) that determines the number of scoops in a quart.  Depending on how big you want your muffins, would determine the yield.  With a number 20 scoop we got 36 muffins.  I could have taken them through the entire yield process, but they were looking hungry, and I needed to bake my muffins!


16 minutes later in a convection oven at 400 we got muffins!  And I did some mini muffins and left them at the paint counter!  It was free paint day, it was busy over there, and I thought the customers just might like it.


My friends learned a few tricks, like “tare”, what, when and why.  We discussed converting recipes (that’s a blog for another time, it involves math!) and why it’s important when you bake.


All In All we got some nice blueberry muffins (and a few chocolate chip ones to!)


Here’s the recipe.  Let me know if you like it.  Not to sweet, and they are not huge muffins.  Just good old fashioned blueberry muffins!

Chef Terri Rees

Here are the general rules for The Muffin Method:  It works for all muffins.  You can add blue berries, cherries, apples, etc. to the finished basic batter.


1.  Sift together the dry ingredients

2 combine all liquid ingredients, including melted fat in this case butter

Add the liquids to the dry ingredients and mix just until all of the flour is moistened.  The batter will look lumpy.  Do not over mix.


Pan and bake immediately!


1 lb 4 ounces all purpose flour

10 ounces sugar

1.25 ounces baking powder

Pinch of salt


6 oz eggs, beaten

14 ounces milk (whole milk – unless otherwise suggested)

½ ounces vanilla extract

8 ounces butter

10 ounces blueberries


Grease and flour muffin tins ( or use papers) fill tins one half to two thirds full.  Bake at 400 for about 20 – 30 minutes.


Sunday, March 10, 2013

Buttermilk Ice Cream


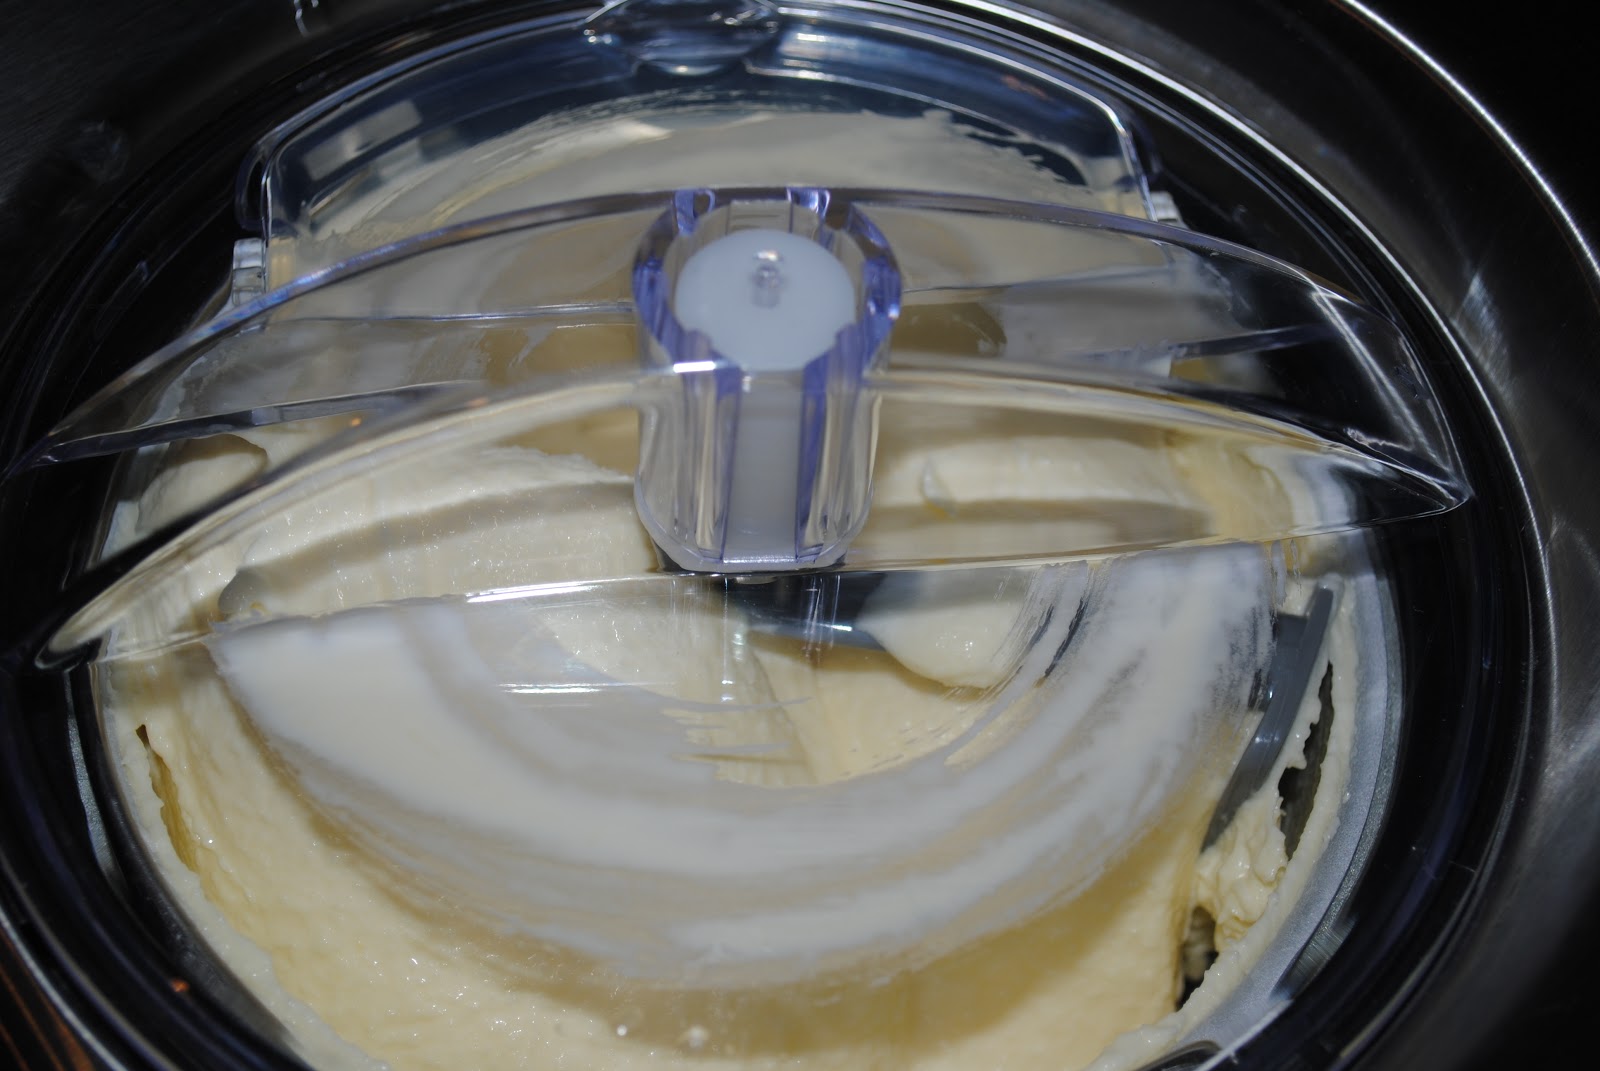
Buttermilk Ice Cream and the New Ice Cream Machine

(or and the new camera!)


I love Ice Cream!  I know this sounds crazy, it’s the beginning of March and I see snow outside, and I’m making ice cream, getting ready for spring and summer.

Last year, I wore out my old machine!  I was making semi freddo, ice cream, sorbets, experimenting, using up leftover cream, milk, and having a blast!  My husband, he’s a purist and working on getting in shape for the Riverbank run (25K) so buttermilk ice cream wouldn’t be a favorite! ( See Jeffery, I’m thinking of you.)

I had a very small dilemma – go big, or replace the freezer bowl, and go small.  I went big (I still might replace the freezer bowl on my old machine so I can take it directly to clients!)


And I have a new Camera.  It’s a Nikon 3000, last year’s model to save some money – and my new adventure in picture taking.  I can accomplish a few items.

Turn it on

Turn it off

Auto

No Flash

and something called Macro.


It came with two videos, a huge book, and the promise of classes!  Yes, I’ll take on the classes!

The Buttermilk Ice Cream came directly from the Cuisinart recipe booklet.  It’s a custard-style ice cream and follows the straight forward custard method. 


Warm the cream, sugar, salt and vanilla.  Whisk egg yolks and sugar to a light pale yellow mixture.  Temper the eggs into the cream, strain to get out the “cooked egg” and whisk in the remaining cold ingredients.  Cool for at least two hours, and then turn on the machine and go!


The Ingredients
 

2 cups Heavy cream

1 cup granulated sugar, divided

1/8 (pinch) salt

1 ½ teaspoons pure vanilla extract

6 large egg yolks

2 cups buttermilk


put the cream, ½ sugar, salt and vanilla in a medium sauce pan and heat on medium low, bring just to a boil


While cream mixture is heating combine the yolks and remaining sugar and whisk until it is pale and thick


Once cream has started to simmer, temper the mixture (this means put a little hot into the yolks and whisk) and then slowly combine. Stirring constantly until the mixture coats the back of a spoon, this should take a few moments.


Pour the mixture through a fine mesh strainer.  Whisk in the buttermilk and chill for two hours or overnight. 


Pour it into the machine, and set the timer for 40 minutes and you have ice cream!