home mise tips events recipes photography

Sunday, March 10, 2013

Buttermilk Ice Cream


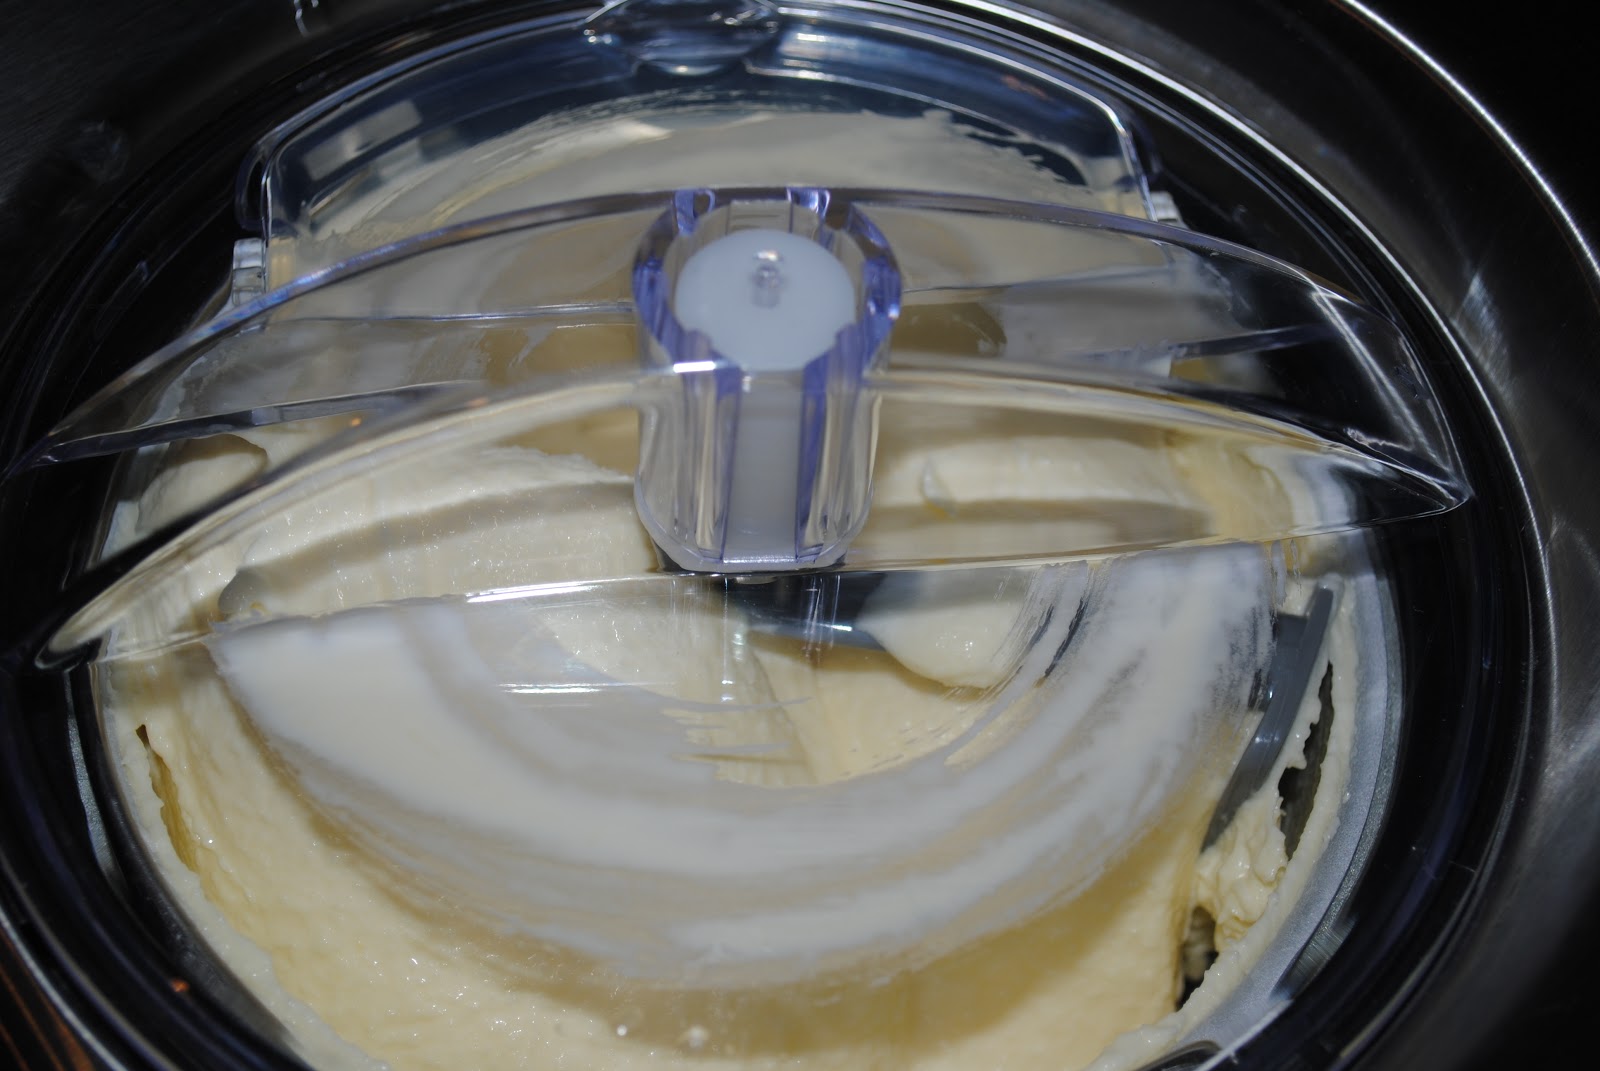
Buttermilk Ice Cream and the New Ice Cream Machine

(or and the new camera!)


I love Ice Cream!  I know this sounds crazy, it’s the beginning of March and I see snow outside, and I’m making ice cream, getting ready for spring and summer.

Last year, I wore out my old machine!  I was making semi freddo, ice cream, sorbets, experimenting, using up leftover cream, milk, and having a blast!  My husband, he’s a purist and working on getting in shape for the Riverbank run (25K) so buttermilk ice cream wouldn’t be a favorite! ( See Jeffery, I’m thinking of you.)

I had a very small dilemma – go big, or replace the freezer bowl, and go small.  I went big (I still might replace the freezer bowl on my old machine so I can take it directly to clients!)


And I have a new Camera.  It’s a Nikon 3000, last year’s model to save some money – and my new adventure in picture taking.  I can accomplish a few items.

Turn it on

Turn it off

Auto

No Flash

and something called Macro.


It came with two videos, a huge book, and the promise of classes!  Yes, I’ll take on the classes!

The Buttermilk Ice Cream came directly from the Cuisinart recipe booklet.  It’s a custard-style ice cream and follows the straight forward custard method. 


Warm the cream, sugar, salt and vanilla.  Whisk egg yolks and sugar to a light pale yellow mixture.  Temper the eggs into the cream, strain to get out the “cooked egg” and whisk in the remaining cold ingredients.  Cool for at least two hours, and then turn on the machine and go!


The Ingredients
 

2 cups Heavy cream

1 cup granulated sugar, divided

1/8 (pinch) salt

1 ½ teaspoons pure vanilla extract

6 large egg yolks

2 cups buttermilk


put the cream, ½ sugar, salt and vanilla in a medium sauce pan and heat on medium low, bring just to a boil


While cream mixture is heating combine the yolks and remaining sugar and whisk until it is pale and thick


Once cream has started to simmer, temper the mixture (this means put a little hot into the yolks and whisk) and then slowly combine. Stirring constantly until the mixture coats the back of a spoon, this should take a few moments.


Pour the mixture through a fine mesh strainer.  Whisk in the buttermilk and chill for two hours or overnight. 


Pour it into the machine, and set the timer for 40 minutes and you have ice cream!


Sunday, March 3, 2013

Smoothies at Rylee's Ace Hardware


On March 2, 2013 I got to spend some time at my favorite hardware store, Rylees Ace Hardware on Michigan Ave, in Grand Rapids, MI.  A hardware store, well, if you follow me around, I do a few demonstrations there.  A hardware store? 

Yes a hardware store!  Owner Lori has the best kept secret in town, a house wares department that is unbelievable!


I was filling in for Chef Kathleen – she was in Florida for a trip, and ironically my daughter Jenn was here for my spring break! 


I was working with Chef Kathleen’s Vitamix making smoothies and discussing ingredients!  Some of my participants are watching their health, and diets, and we had a great time reading the labels.  I made all of my smoothies allergy friendly (well for most) – they were gluten free, soy free and dairy free – using coconut milk and water, and pomegranate juice!


Here are some of my fans Bob and his wife Ann (on the left!)  Of course we really didn’t follow a “recipe”, we decided to play around with the ingredients as I brought spinach, kale, fruit, avocado, honey, agave, and ginger!


We started with the “greens” as I call them.  Incorporating those dark rich leafy green vegetables, and then some banana and pomegranate juice.  It wasn’t very friendly looking, in fact Ann had to close her eyes to taste, but all agreed that it was pretty darn good!


We then went to avocado, mango, banana and peach, my favorite.  We added lite coconut milk, and I’m thinking that I might try this mixture in my new ice cream machine; it was really tasty, and thick.  Of course you could thin it out if you like.


With the Vitamix, it has loads of power, and mixing everything up, easy as eating a piece of cake!


I don’t know, all in all it was a fun hour of creating new and healthy smoothies!  What’s your favorite smoothie?


We have raspberry, mango, banana &in  the back  kale, banana & pomegranate and way in the front avocado, peach, and mango!  Yum.

Hope to see some of you at one of my next demo’s at Rylee’s!  Check out my facebook page for more information on Events!  https://www.facebook.com/TuxedoJunctionCatering?ref=hl

Chef Terri Rees


Saturday, March 2, 2013

5 Easy tips


I plan parties and execute them for a living.  I’m passionate about food, plates, silverware, the setting – all of it.  It’s a good thing I do this for other people, because my husband couldn’t care less most of the time!  He doesn’t understand why I like the plates all in the same spot on the table setting, or the glasses in the correct corner.  What does that say?!  Every day meals at the Rees Residence are probably just like the ones at your house.


When I plan “big” parties for my clients I take the stress of this planning away from them.  Usually not all of it, my domain is the kitchen, the dining room, where ever there is food.  It’s usually at least 50% of the stress that they have.  Everyone loves the adrenaline rush that you get while preparing for a party, even my husband – he won’t admit to it, but I know that it’s true! They worry if the house is clean enough, do I have enough ice, what’s the weather going to be like, and everything in-between! 

I’ve seen long complicated check list.  I have a few that I make up for my events, and I wouldn’t even begin to suggest that you do this!  You know how much silverware you have, and where your glasses are! 

There are some things that you can do, and here are some easy tips to keep in mind.


5 Easy Tips

1.  I always try out the recipe before I actually try it on my guests! Why?  I need to know how it will taste – and so should you! I need to know how it will cook, and so should you!  And most important, I need to know how much time it will take me to get it done!

2.  Don’t go too complicated.  Not all of us are master chefs and sometimes simple with a few little tweaks are  great.

3.  Shop, Shop, Shop – make sure you have all of the recipe’s ingredients on hand – we call this mise en place. 

4. Taste your ingredients (or smell them) for freshness, and taste your meal as you go!  That’s the only way you’ll know how the finished product will turn out!

5.  Finish with a great (and easy) dessert!  It’s the last bite of the day, and that’s the one that they will all remember.

Sunday, February 24, 2013


The Sunday Project – February 24, 2013

Tuscan Bread Soup

Sometime ago I need a “go to” soup, one that I could whip up and would be fantastic every time for my position at Meyer May House in Grand Rapids, MI.  I was in charge of 6 course meals for the Frank Lloyd Wright museum owned and operated by Steelcase.  I had the privilege of serving guest around the world. 

The position of “chef” at the house was a wonderful first spot out of Grand Rapids College’s Culinary Arts Program, as I got to work with almost anything that I wanted.  I did, as we all do, have to be cost conscious, and put out wonderful food but I was also allowed to be creative.

I went to my friend and mentor Jorge Sanchez and asked one time if he would share a soup with me.  Now I know lots of chef’s who think that sharing is a “no-no” and Chef Sanchez is not one of those!  So I give credit where credit is due.  This is his version of Tuscan Bread Soup.  Why his version you ask?  Well I’ve learned over the last several decades, that not much is really “new.”  Oh, the products might change, but in reading recipes in books (and now on line) everyone has a favorite that they may have tweaked a little bit, but in essence lots of recipes have been created over and over again in the family home.  I even have some of those recipes, though believe it or not, some of them had a can of Campbell’s soup as a base!  My mother is frugal, knew how to garden, and could whip up a meal quickly. 


Here is Chef Jorge Sanchez’s Tuscan Bread Soup.  I made a version this week for Davenport University’s Dining Hall, and it was rather tasty!


Thank you Jorge for being a good friend and mentor and reminding that simple food  is so good!


Tuscan Bread Soup


6 tablespoons
EVOO
6 cloves garlic
Crushed
1 12 ounce can
Peeled whole tomatoes
Sea salt/ground pepper
To taste
48 oz
Chicken broth
½ loaf
Day old French or Italian bread/drier the better
10 fresh
Basil leaves, torn not chopped


In a medium pot, medium heat add ½ olive oil and the crushed garlic, when the garlic infuses with the oil, add the whole tomatoes and crush into chunks with spoon, or your hands.

Add Salt and pepper to taste

Make this “saltier” than you think.  The bread will be added, and this will adjust the salt.

Add Broth and stir


Bring to a simmer for 10 minutes.


With your hands, pull the bread into bite sized chunks, and add them to your bowls.  Ladle soup into bowls, and add basil to the top of each bowl.


Sunday, February 17, 2013

Risotto


 I made Risotto tonight for dinner, lovely, simple, some say time consuming, but not me.  Today's was just mushroom risotto, served with sauted pork chops and corn.  Simple, yes, but oh so good. 

Risotto

Serves approximately 4


5 cups chicken stock - simmering

2 tablespoons oil

1 garlic clove crushed

1 leek, white part only sliced

1 fennel bulb thinly sliced

2 cups Arborio rice

½ cup freshly grated parmesan cheese


To make the risotto

Heat the oil and garlic in a large heavy based sauce pan, add the leek, and fennel – cook over medium heat until slightly browned.  Add the rice and stir for approximately 3 minutes, until translucent and smells kinda like popcorn.


Add the stock 1 cup at a time and stir constantly until the liquid is absorbed.  Continue adding liquid ½ cup at a time until all the stock has been incorporated, and the rice is al dente.  This will take about 30 – 40 minutes.  Remove from the heat and stir in the cheese.  Let cool slightly.


Note:  you may omit the fennel and the leek and use a medium white onion.  Risotto is very versatile, you can add mushrooms, asparagus, almost any vegetable about 5 minutes before it is done!

Wednesday, February 13, 2013

Chocolate Pomegranate Pistachio Bar


Chocolate Pistachio Pomegranate bar


I’m teaching a Valentine’s class tomorrow, and I love to give my guest a little something to remember me.  This time it’s a chocolate bar.  I was wondering how I would get the time to make truffles, and remembered how easy it was to make chocolate flavored bars.


I used about 2 pounds of chocolate chips, melted them down, and spread them on a Silpat, a special baking sheet, but you can use parchment paper or wax paper.  I then spread this wonderfully delicious Gluten Free nut blend snack that I had found with Pomegranate, pistachios, almonds, cherries and black pepper.  I smoothed it out, pressed the nut mixture in and let it set back up again over night.


Then, I broke it into pieces to package it up in these cute Chinese take out boxes that I have.


I bet that you wish you were in my class!  Maybe I’ll see you next year.


Sunday, February 10, 2013

Valentine's Day - A Tie Breaker!


Valentine’s Day, it’s coming up.  I never really got into the holiday, but for the last 5 years I get to teach a Valentine’s day class at the Spartan Culinary Classroom.  I’m also learning about social media (facebook, sorry not twitter yet) and blogging. 

I asked the question for the Sunday recipe of the week,  breakfast in bed, or dinner?  I got a tie!  It was only 8 votes, but still a tie!  So this week there will be two recipes!  I hope some of you try these, as they are wonderful; and pictures of these should appear shortly after Valentine’s day as these will be featured in the 2013 Valentine’s Class!  I hope that you enjoy.


I made this for a brunch this summer for a client of mine.  It was a huge hit, and of course, I give credit where credit is due!  We had sautéed apples to fill the pancake and Mr. Jim (that’s all I’ll give away!) had several helpings!

·         Dutch Baby


·         Ingredients:
2 tbsp vegetable oil (I used canola)
1 cup all-purpose flour
1/4 cup cornstarch
2 tsp grated lemon zest plus a squeeze of fresh lemon juice (for serving)
1 tsp salt
3 large eggs
1 1/4 cups skim milk
1 tbsp butter, melted and cooled
1 tsp vanilla extract
3 tbsp powdered sugar

·         Method:

·         Heat the oven to 450 degrees. Pour the oil into a 12-inch oven-safe skillet and make sure the bottom is coated and brush some along the sides, making sure it’s completely coated. Place the skillet in the oven while it’s preheating until the oil is shimmering, which takes about 10 minutes.

·         In a large bowl, combine the flour, cornstarch, lemon zest and salt. In another bowl, whisk the eggs until they are frothy and light. Whisk the milk, butter and vanilla into the eggs. Whisk 1/3 of the egg mixture into the dry mixture until no lumps remain, then add the rest of the egg mixture and mix until smooth.

·         Open the oven and pull out the rack, keeping the skillet in the oven on the rack. Pour the batter into the heated skillet and push the rack back in and close the oven. Bake until the edges of the Dutch Baby are deep golden brown and crisp, about 20 minutes. Sprinkle with the lemon juice and powdered sugar (it’ll deflate, don’t freak out). Cut into wedges. We served ours with syrup drizzled on, it was really good!

·          


This one I love for dinner.  I’m a flank steak kinda gal when I can get it reasonably priced!  Flank can be tricky, you have to slice it against the grain or you’ll be sorry, it’ll be tough and you will hate it.  Of course, you don't have to brave the snow outside here in Michigan to enjoy this.  Just use a saute pan, and you'll get great results, so good, you won't want to wait to get to a grill this summr!


Horseradish Rub w/ Flank Steak with grilled onions and tomatoes


This is a great rub to add heat to whatever you're grilling or smoking. Don't worry too much about the horseradish; the heat is taken out by the cooking process.

Note:  you can use a grill pan in winter to get those nice marks on your flank, or just use a hot frying pan or griddle!  Anyway, it’s wonderful, and the heat is great for Valentine’s Day!


Yield: Makes about 2 1/2 cups

Ingredients:

  • 3/4 cup freshly grated horseradish root
  • 1/2 cup finely chopped garlic
  • 1/4 cup kosher or canning salt
  • 1/4 cup black pepper
  • 1/2 cup olive oil
  • 2 tablespoons ground cumin
  • 1 tablespoon Dijon mustard
  • 1 tablespoon brown sugar

Preparation:

Combine all ingredients and store in an air-tight container and refrigerate


Serves 5 - 6

2 – 3 pounds Flank Steak

Salt and Pepper


The flank steak comes from the underbelly of the cow, near its rear portion.  Because of its texture and shape, it marinates well, and is easy and fast to grill!


Rub the horseradish spice into the flank steak and let marinate for 1 hour or overnight. 


Meanwhile heat the grill to medium high – if using coals start about 45 minutes before you need to feed the masses!  Cook for 3 – 4 minutes per side for medium.  Let the steak rest for 5 minutes.  Cut on the bias, mound on a platter and garnish with grilled onions and tomatoes  


Grilled Onion Slices


2 large yellow onions

Salt/pepper to taste

EVOO


Slice onions into1/4 inch rounds.  Sprinkle with EVOO, salt and pepper.

While the flank steak is resting, place the onion slices on the grill, turning to prevent burning, until tender.


Remove and garnish the steak platter with grilled onions.


Grilled Cherry Tomatoes


2 pints cherry tomatoes, cleaned and hulled

Extra Virgin Olive Oil to taste

Salt and pepper to taste

3 tablespoons Champagne Vinegar


Toss the cherry tomatoes with the olive oil

Place in a grill basket and then on a hot grill.  Let the tomatoes “char” briefly until the pop open.  Remove and toss with the vinegar and the salt and pepper to taste.